

- Entra administrator: creates the Enterprise Application and assigns users. Needs the Cloud Application Administrator role or higher.
- Console administrator: creates the SAML Social Application in the Console admin (Django admin → Social applications).
Prerequisites : enable SSO on the Console instance
SSO sign-in only works once the instance-wide config keySSO is True. A Console instance administrator sets these keys in the Console admin, under Config key values (authentication category):
Company settings, in the Console admin under Companies:
- Auto provision external users: turn on together with
SSO_LDAP_SIGNUPto create accounts automatically. - Login method: set to Single Sign On to require SSO and block password sign-in for the company’s users. Leave it on Password while you test.
Step 1 : Create the Enterprise Application in Entra
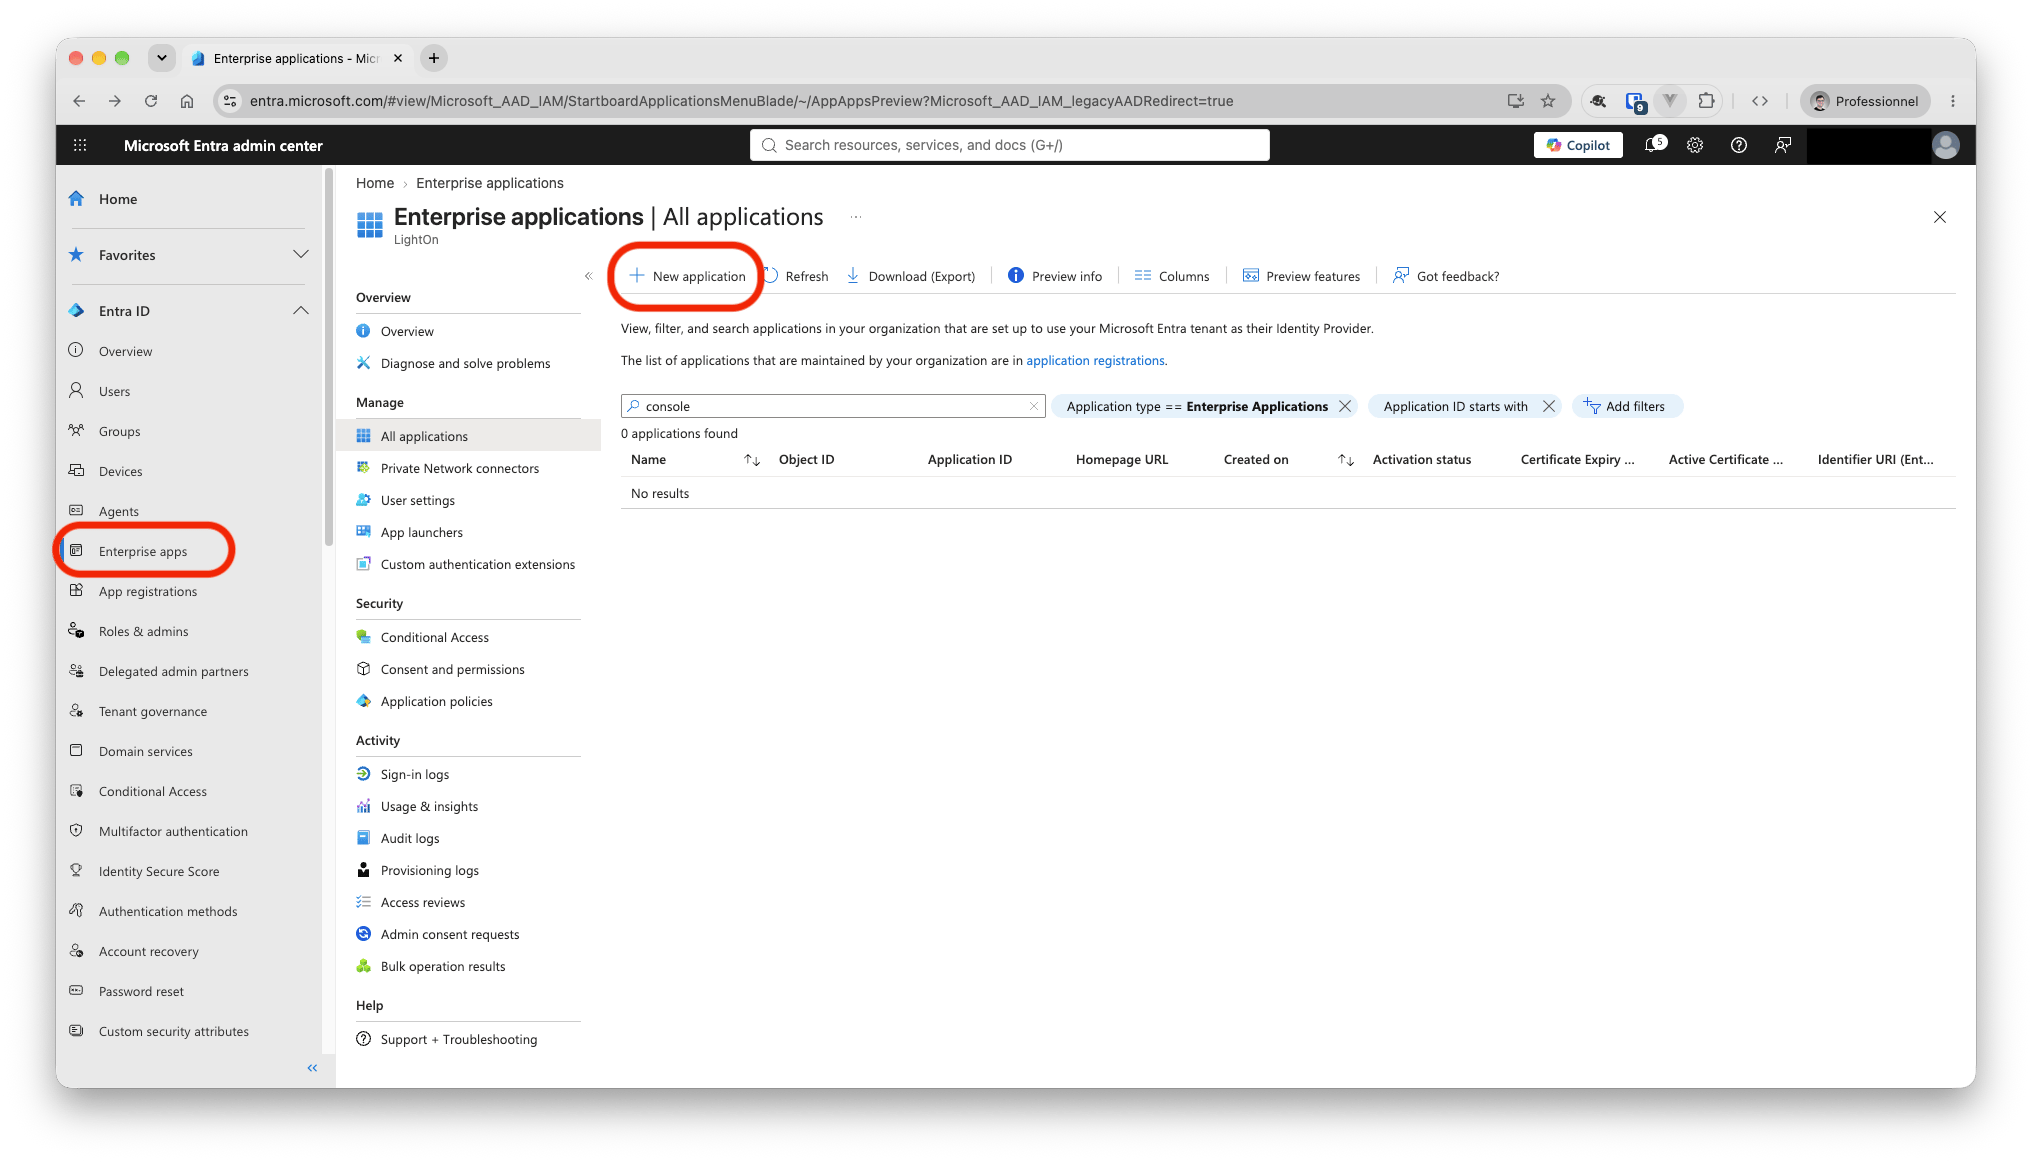
- In the Microsoft Entra admin center, go to Identity → Applications → Enterprise applications.
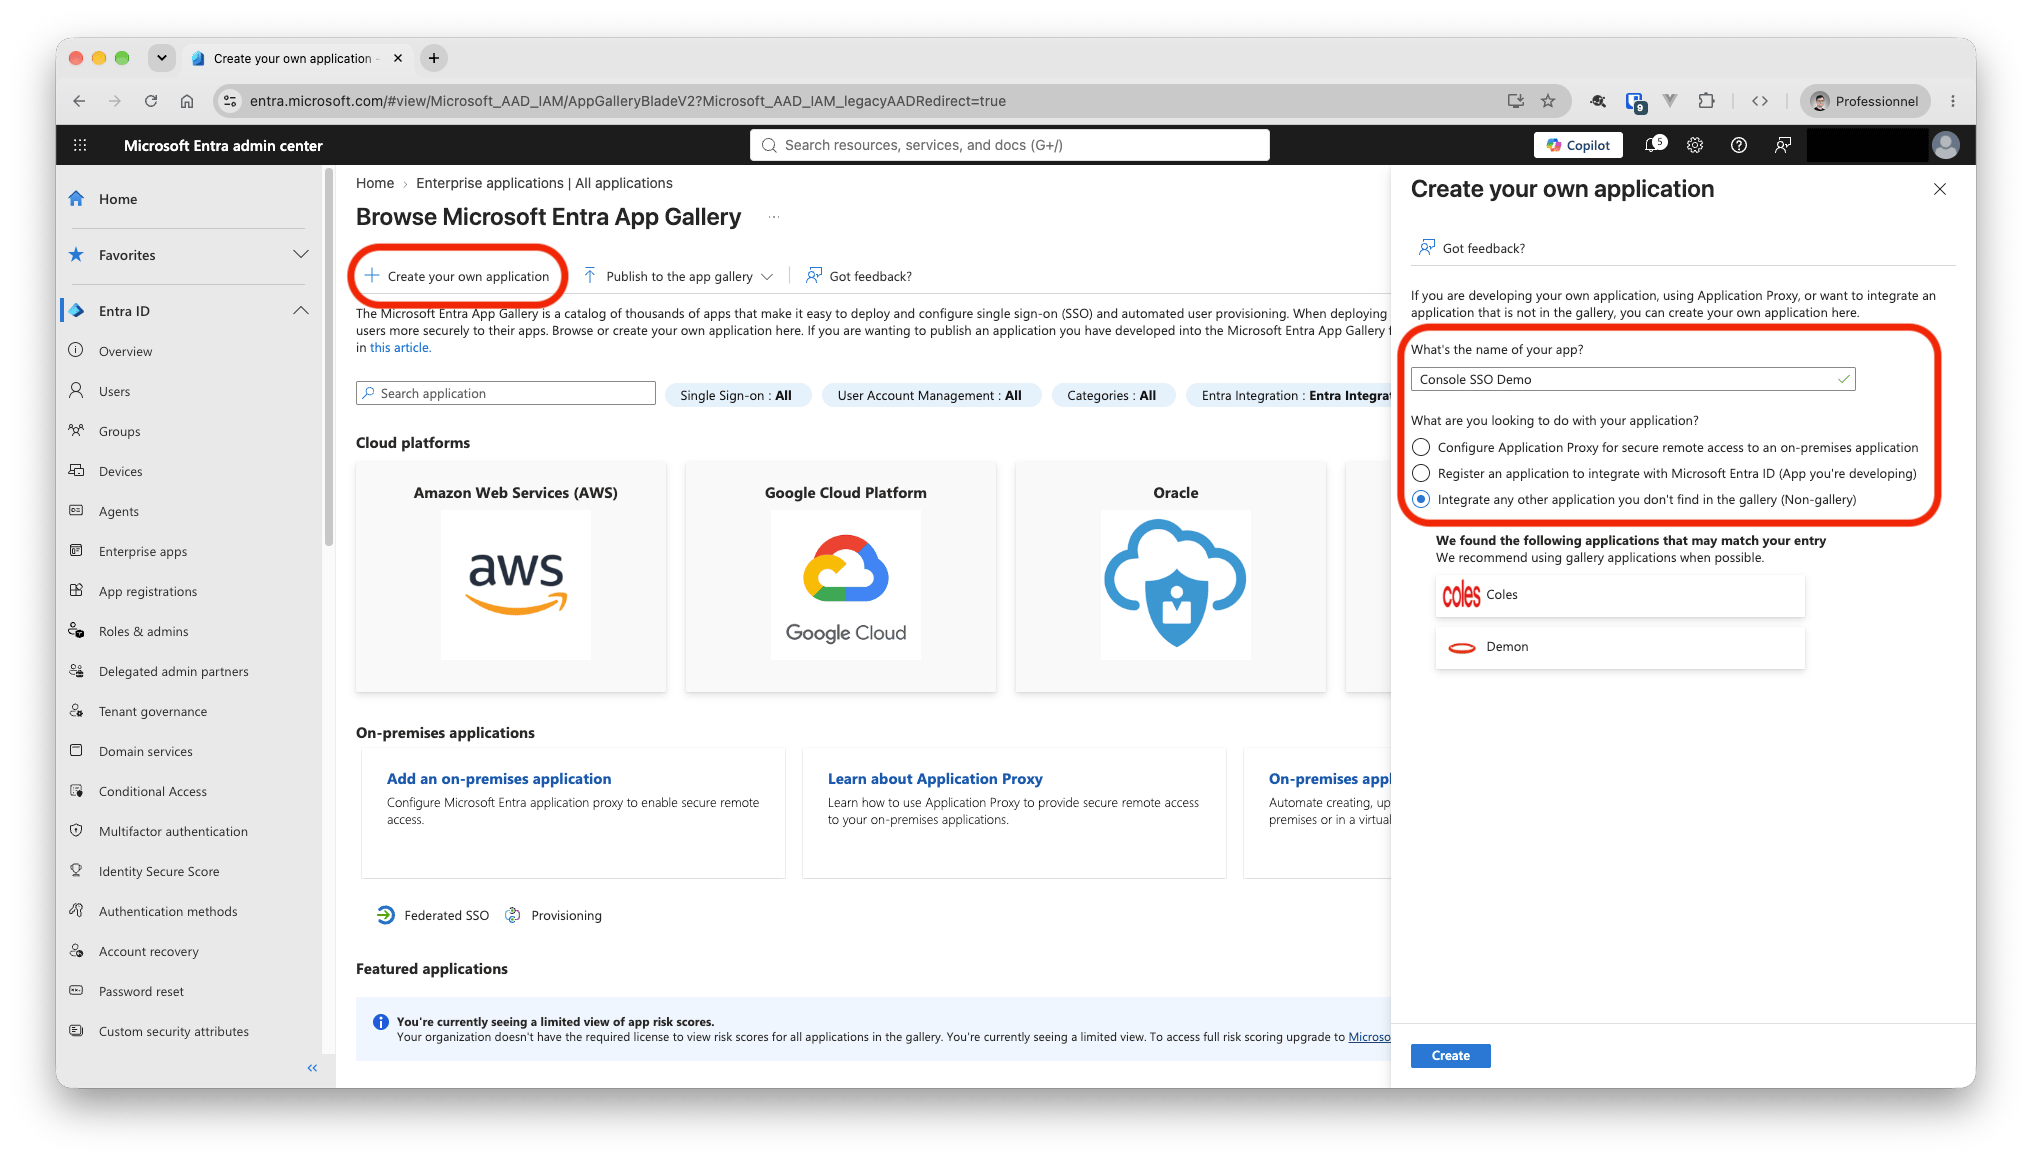
- Click New application → Create your own application.
- Enter a name, for example
Console SSO Demo, and choose Integrate any other application you don’t find in the gallery (Non-gallery). Click Create. - In the new application, open Single sign-on and choose SAML.
Step 2 : Basic SAML Configuration
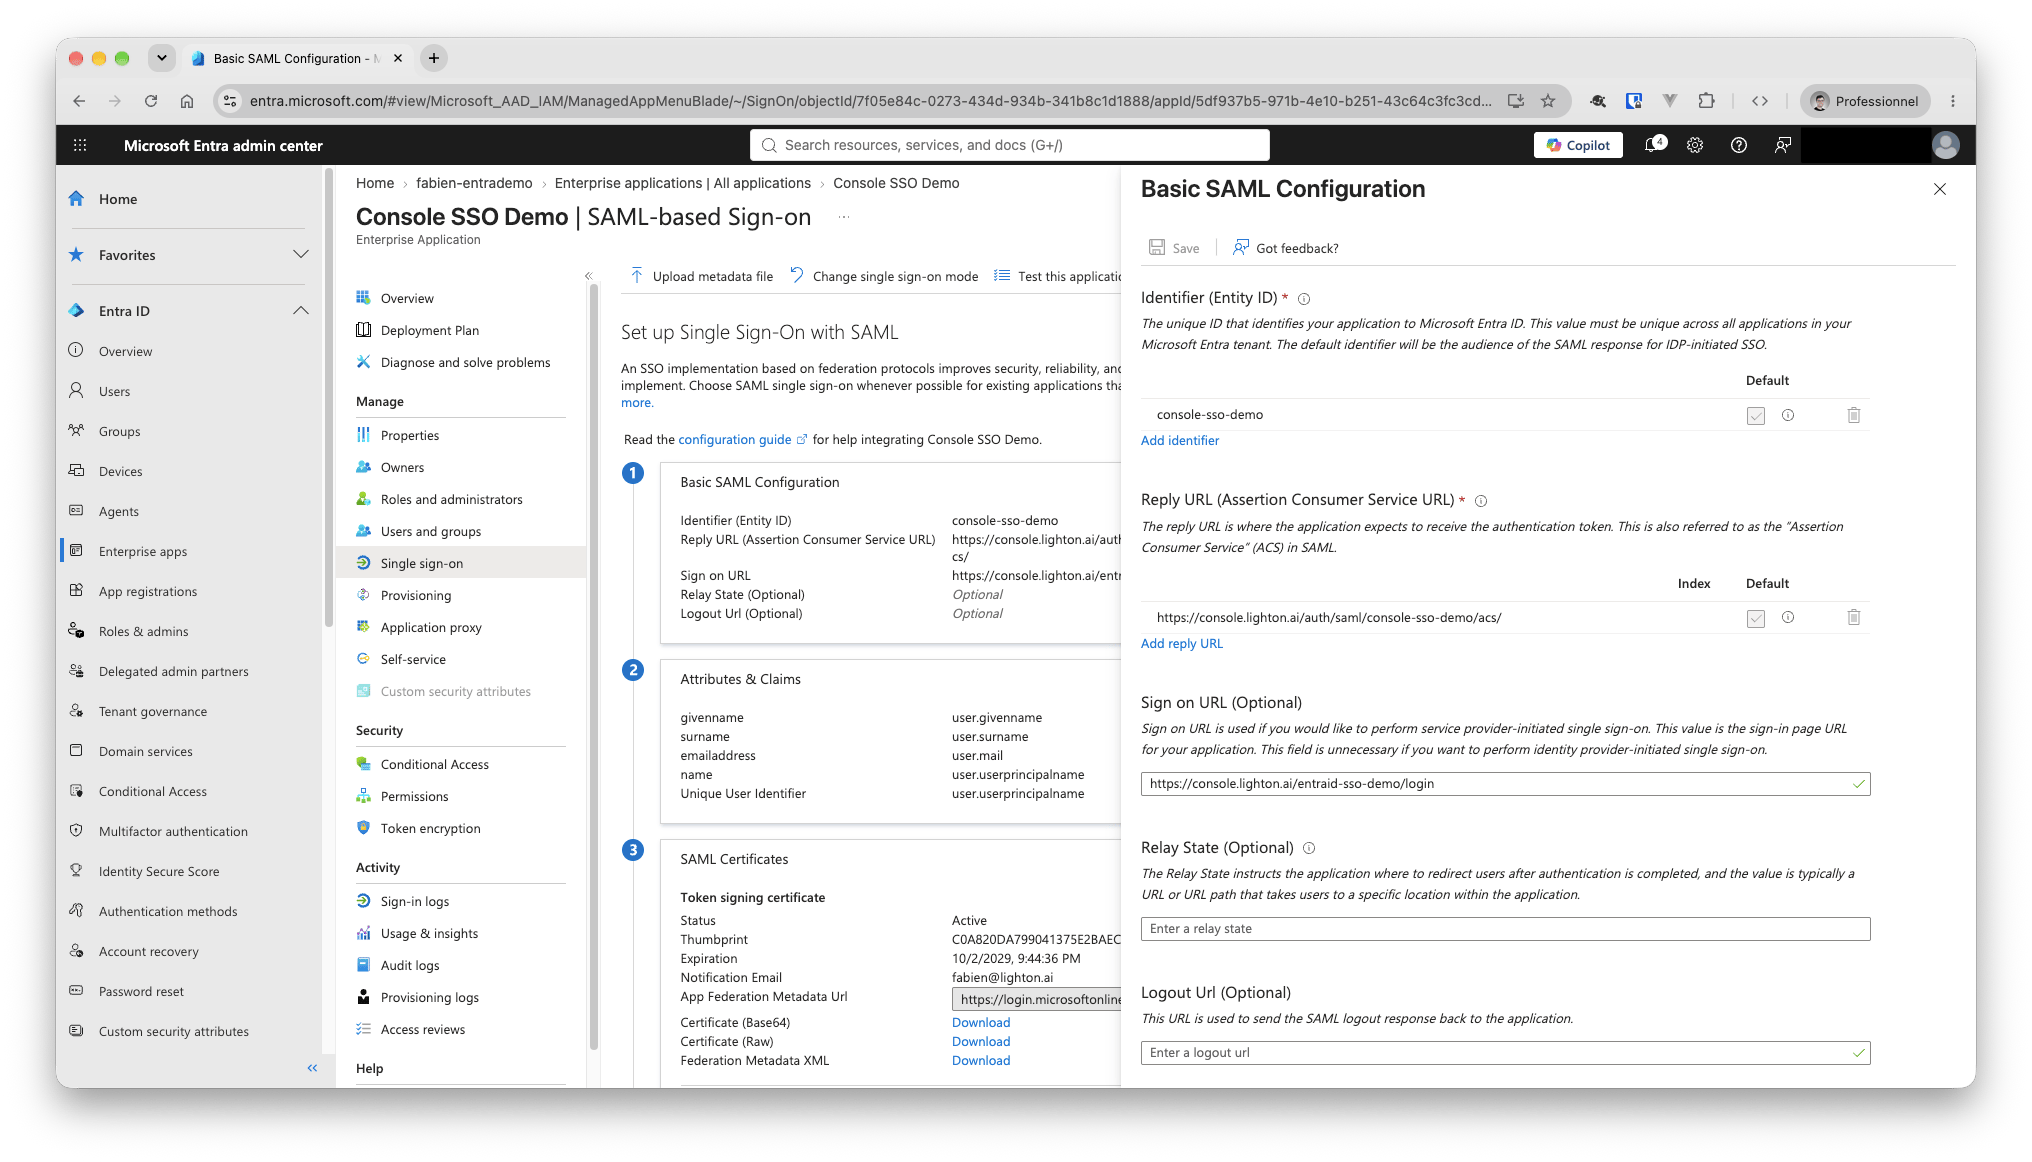
On the SAML page, edit Basic SAML Configuration and set:
Save. Leave SAML Certificates as they are: Console reads the signing certificate from the federation metadata URL.
Step 3 : Attributes & Claims
Keep the defaults Entra creates for a new application. Don’t add, rename or delete claims.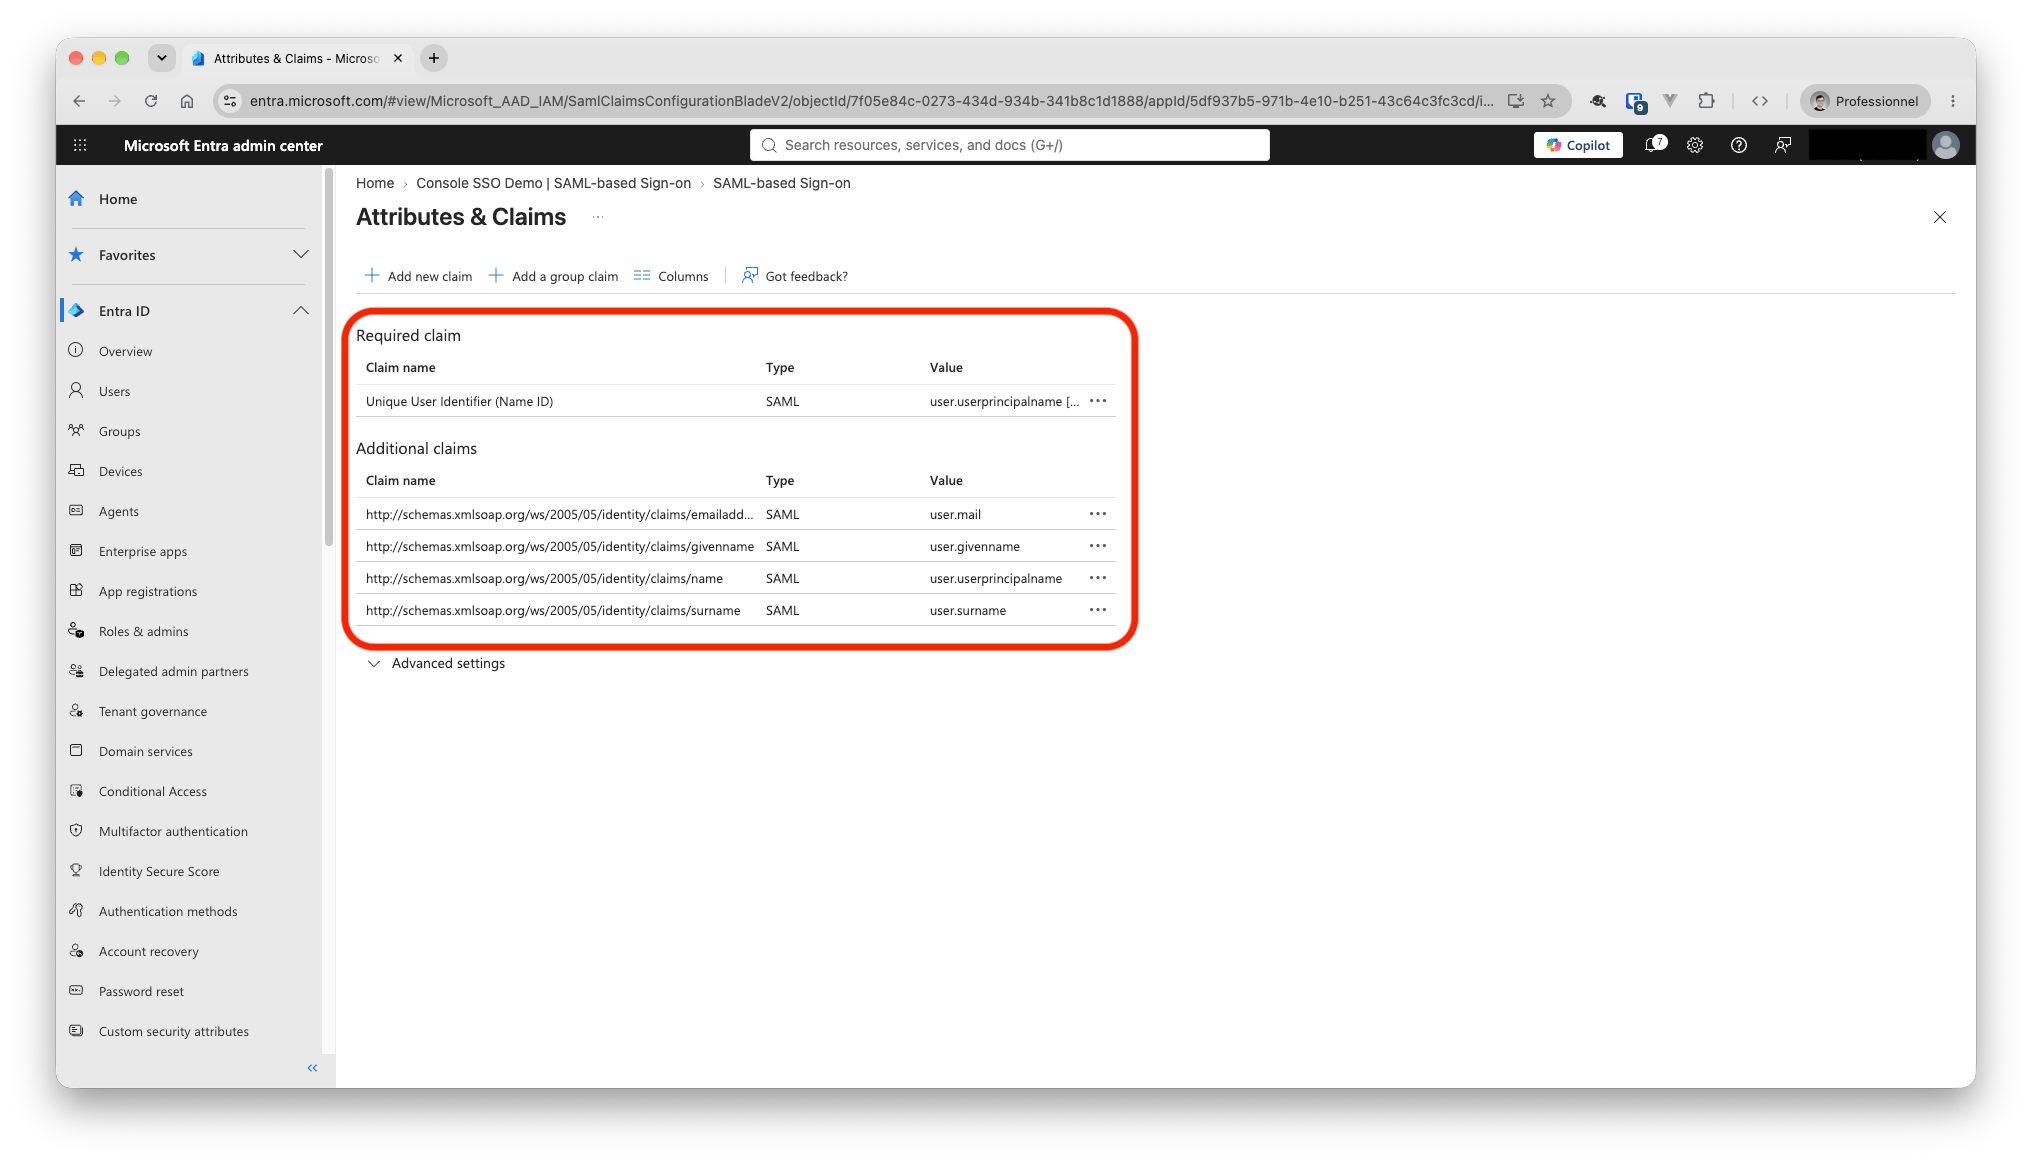
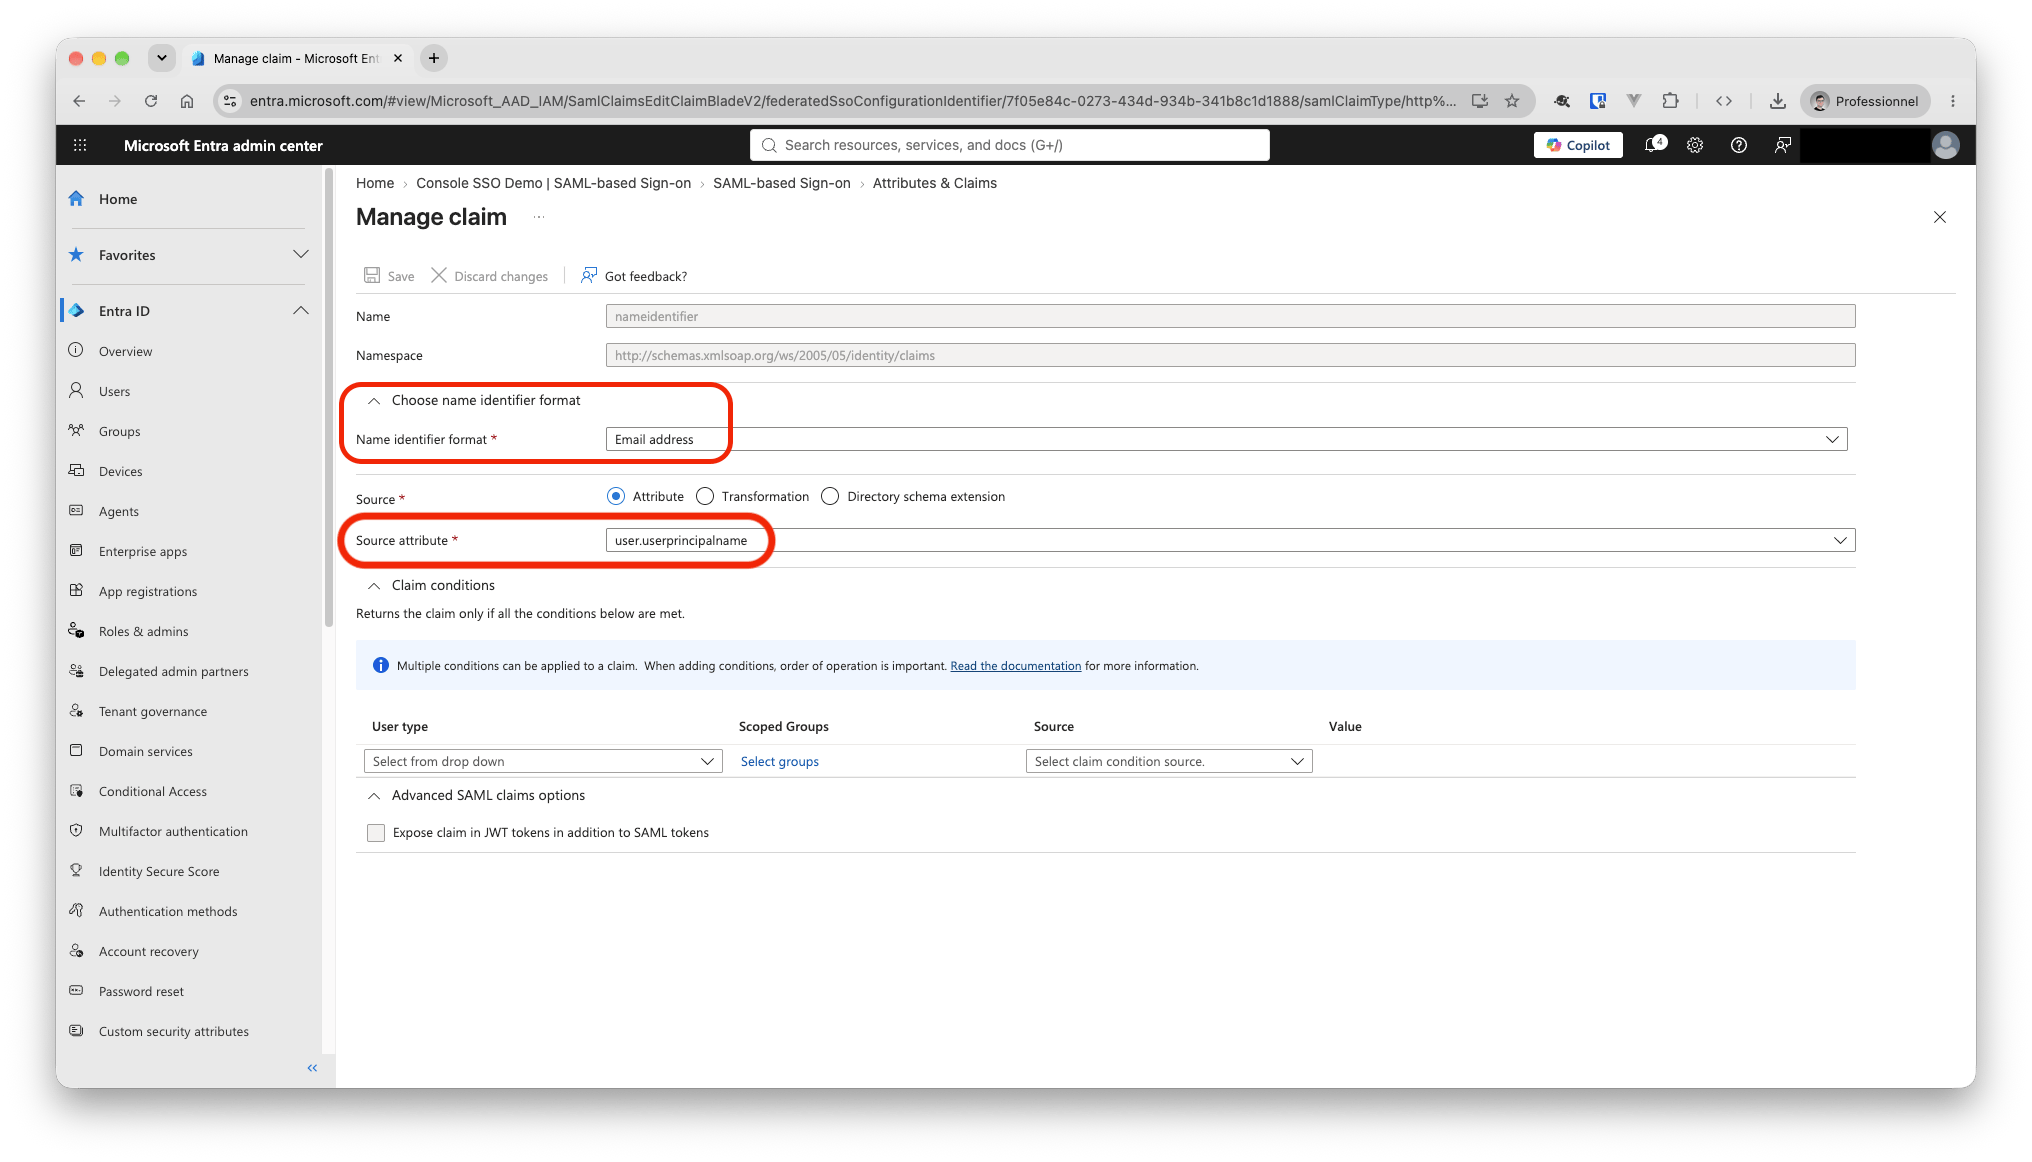
objectidentifier (with tenantid, identityprovider and authnmethodsreferences) to every token automatically. You don’t need to configure it.
Check user emails. Entra omits a claim whose source attribute is empty.
If a user’s Email (
Make sure each user’s
If a user’s Email (
mail) is blank, Console falls back to the Name ID (the UPN). Make sure each user’s
mail or UPN is the address they use in Console: Users → the user → Properties → Contact information → Email.Step 4 : Collect the Entra values and assign users
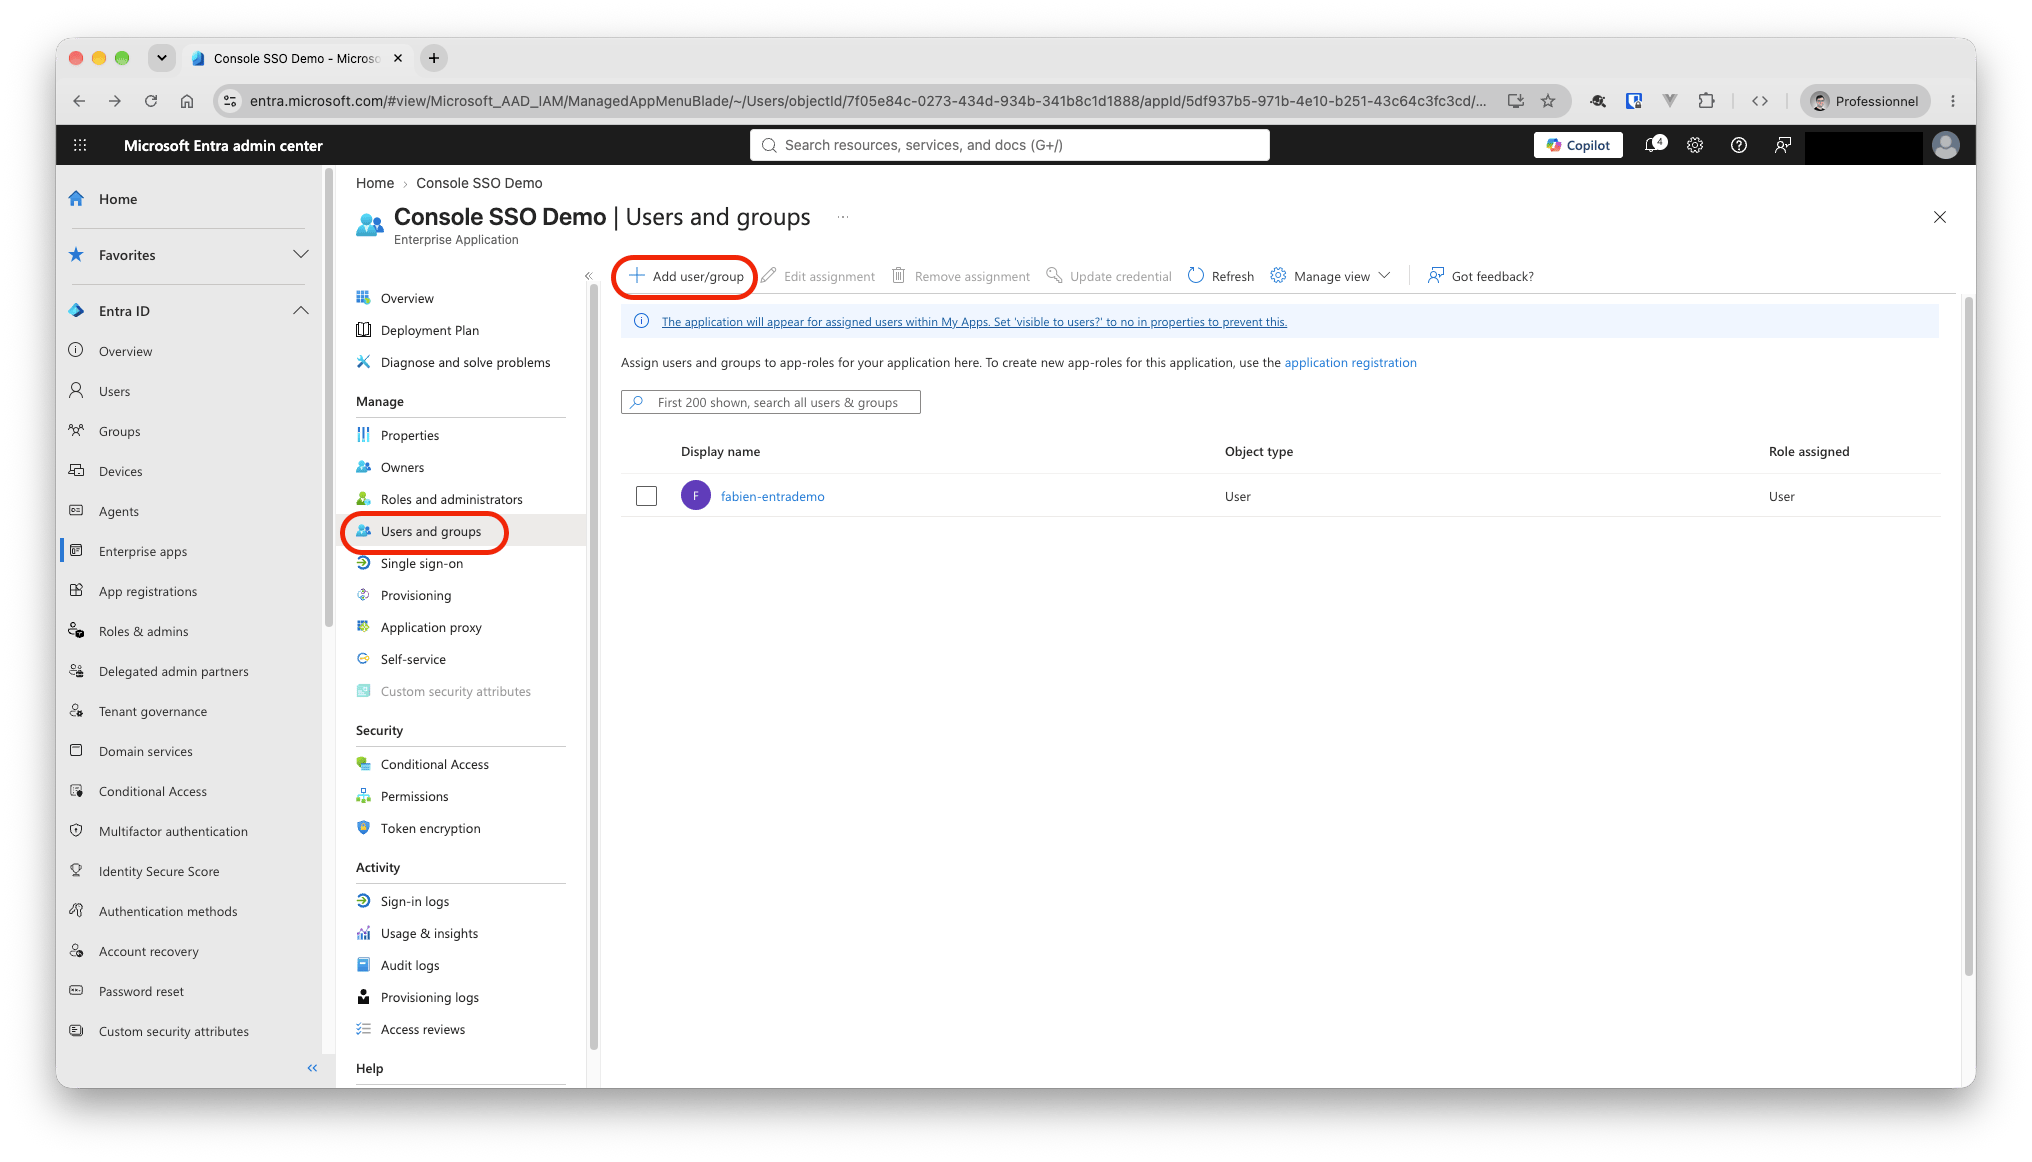
The Entra administrator sends these two values from the SAML page to the Console administrator: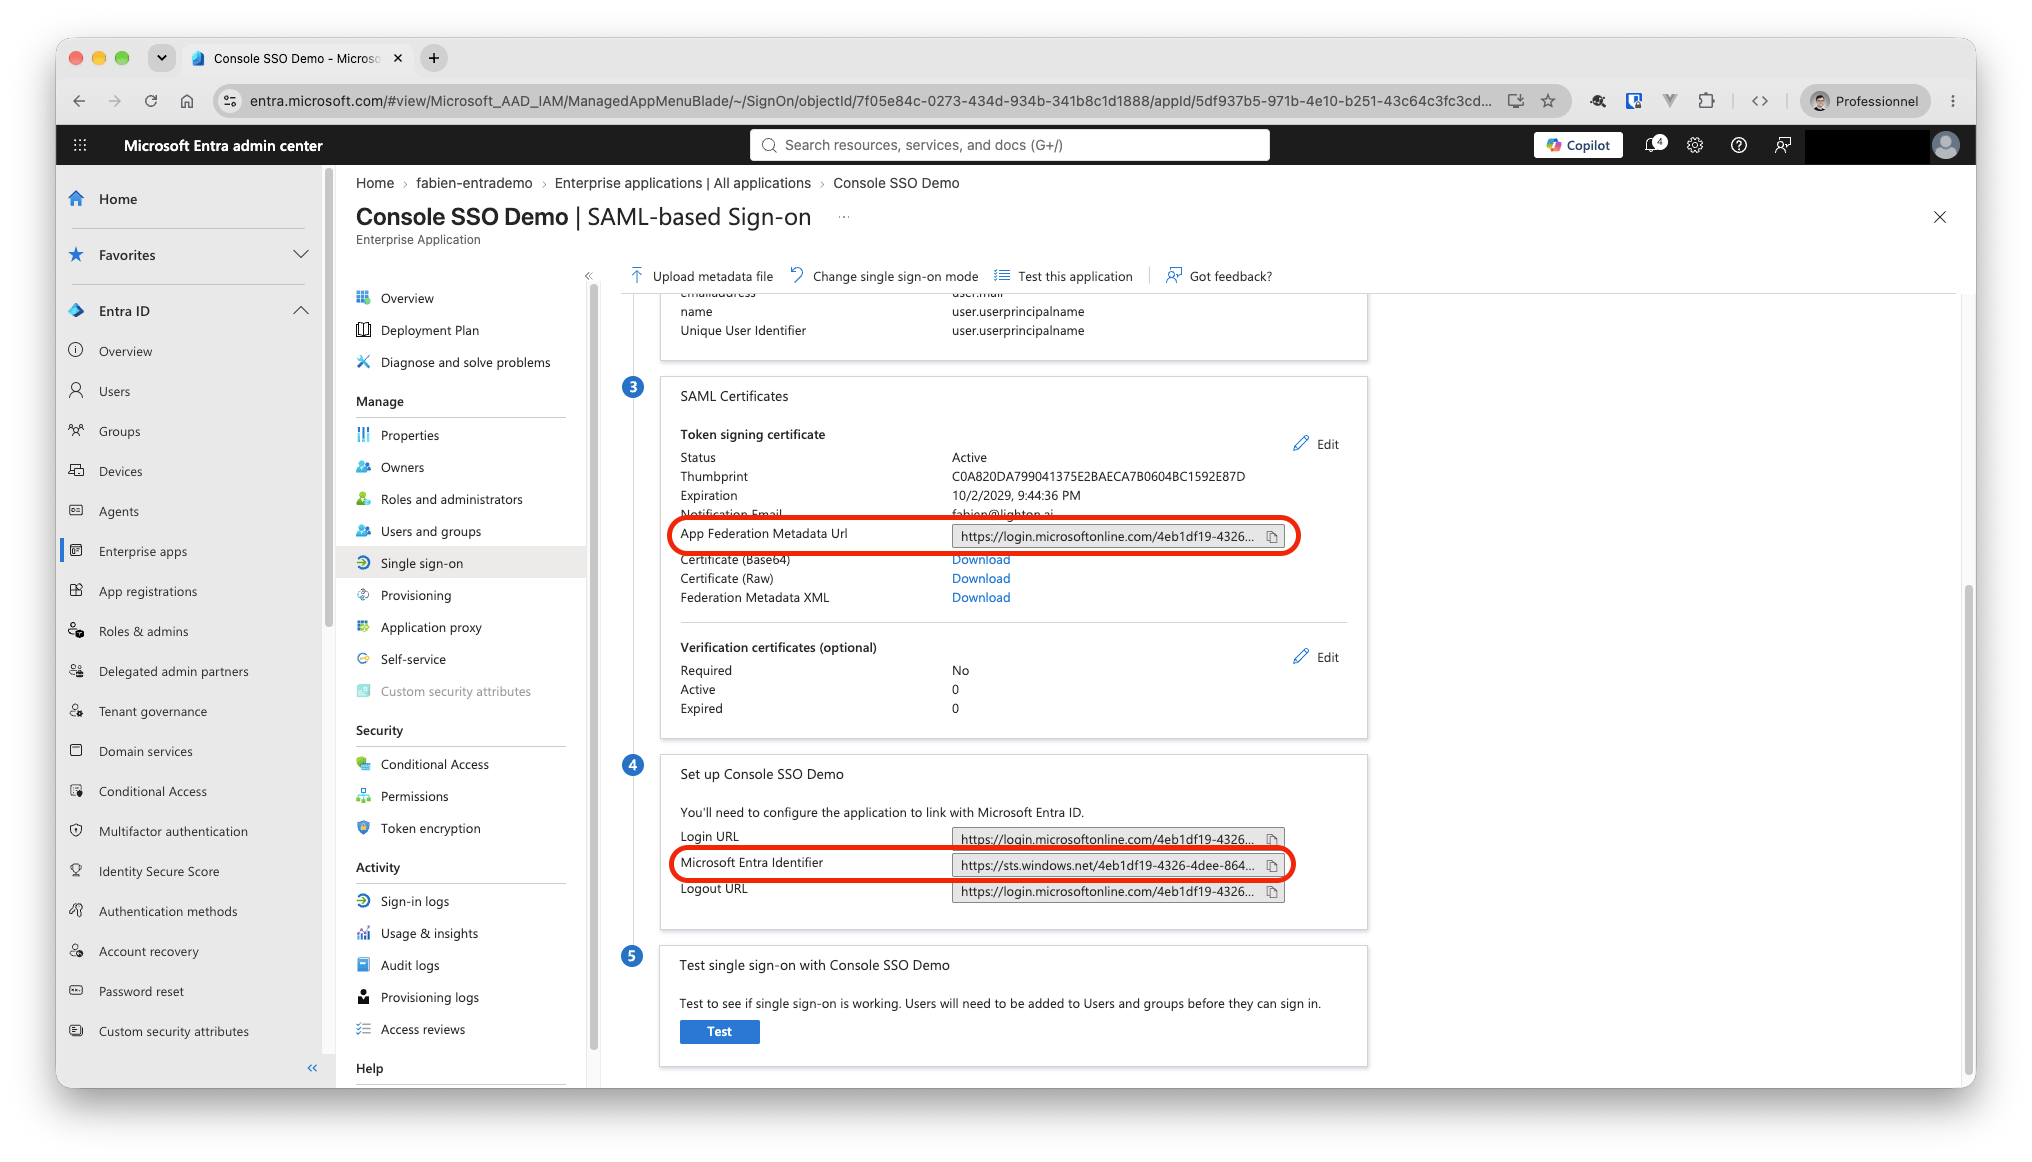
A user who isn’t assigned gets an Entra error (AADSTS50105) before reaching Console.
Step 5 : Configure the Social Application in Console
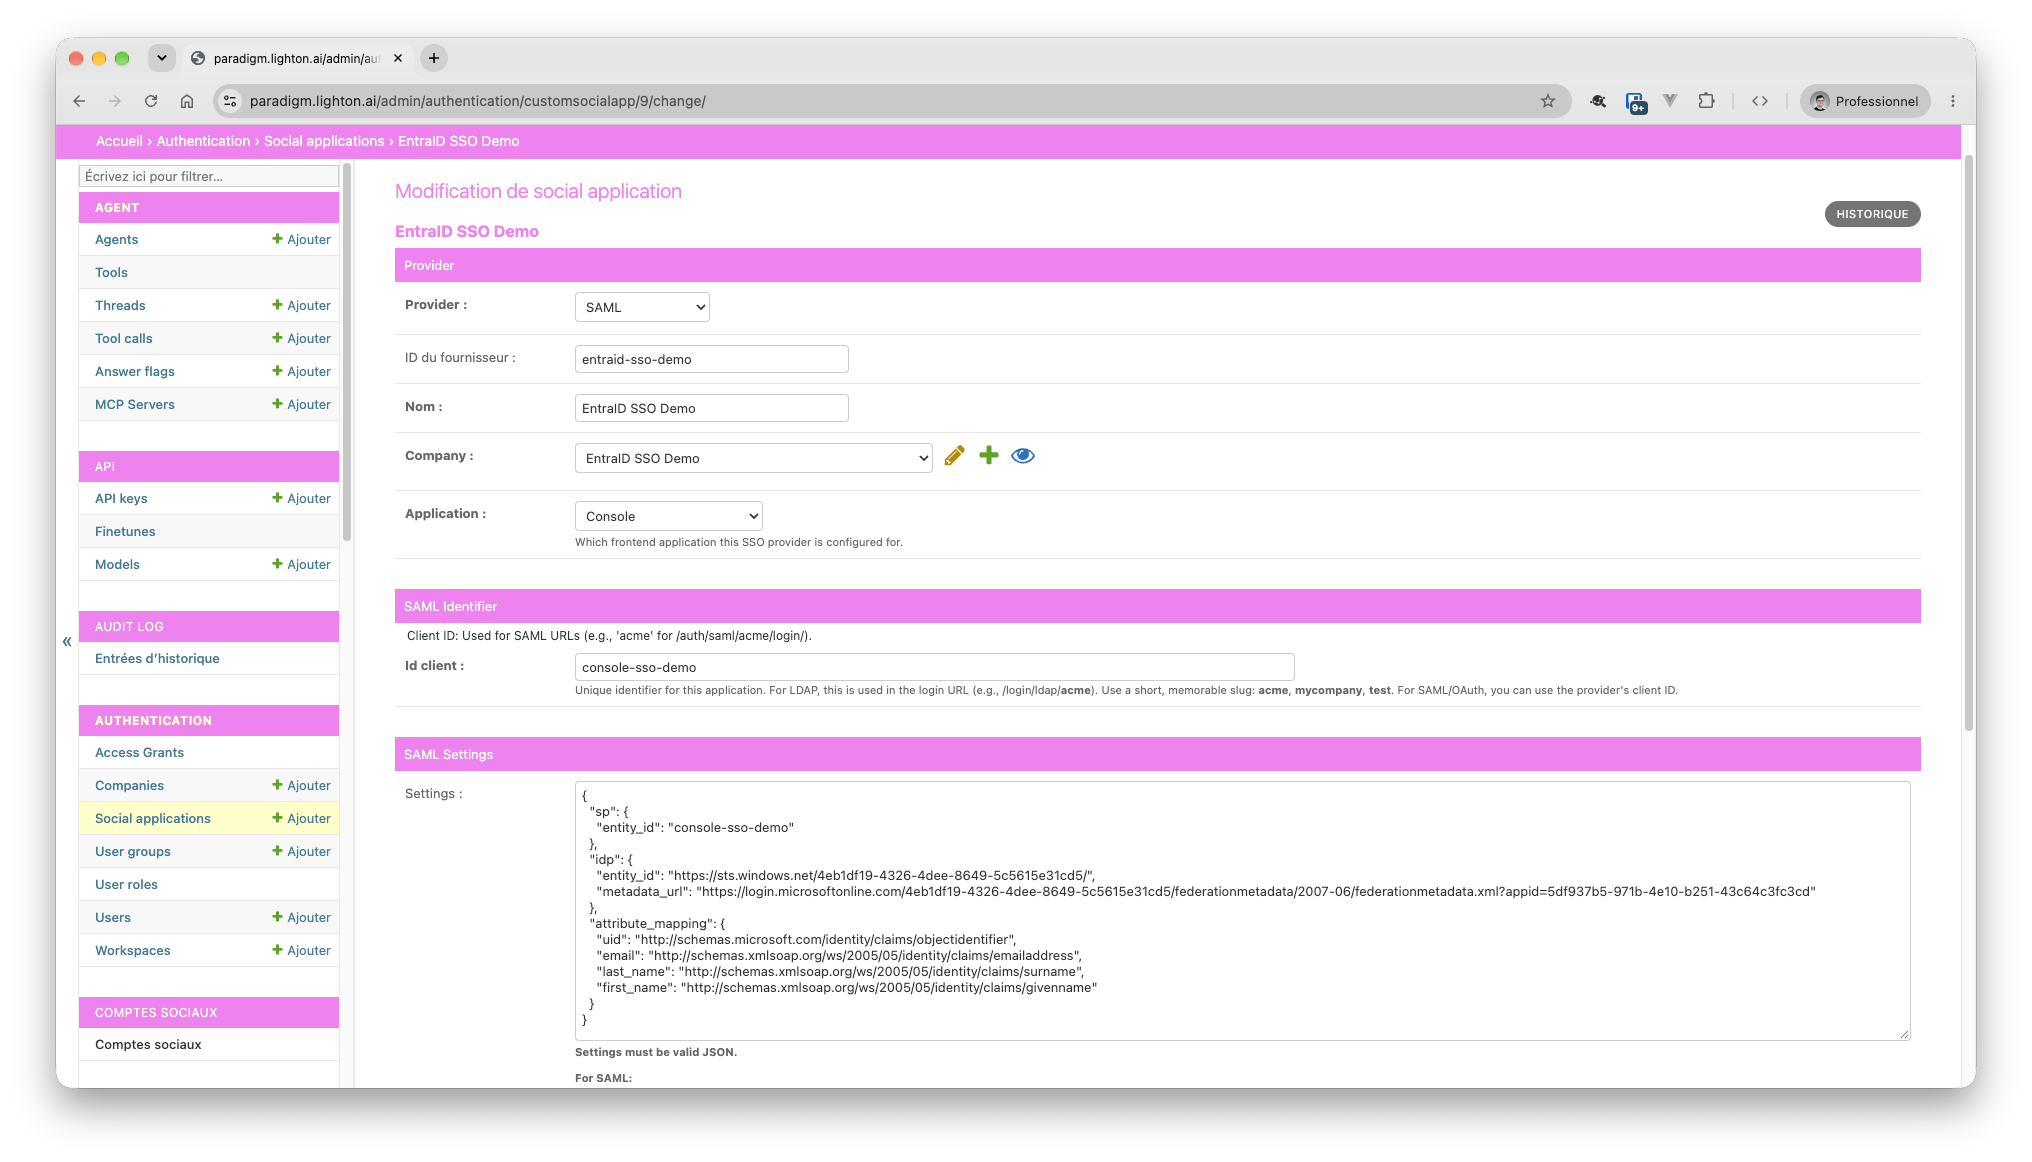
In the Console Django admin, open Social applications → Add and fill in:
Set Settings to the JSON below, replacing the placeholders:
Step 6 : Test the sign-in
- In Entra, open Single sign-on → Test this application and sign in as an assigned user.
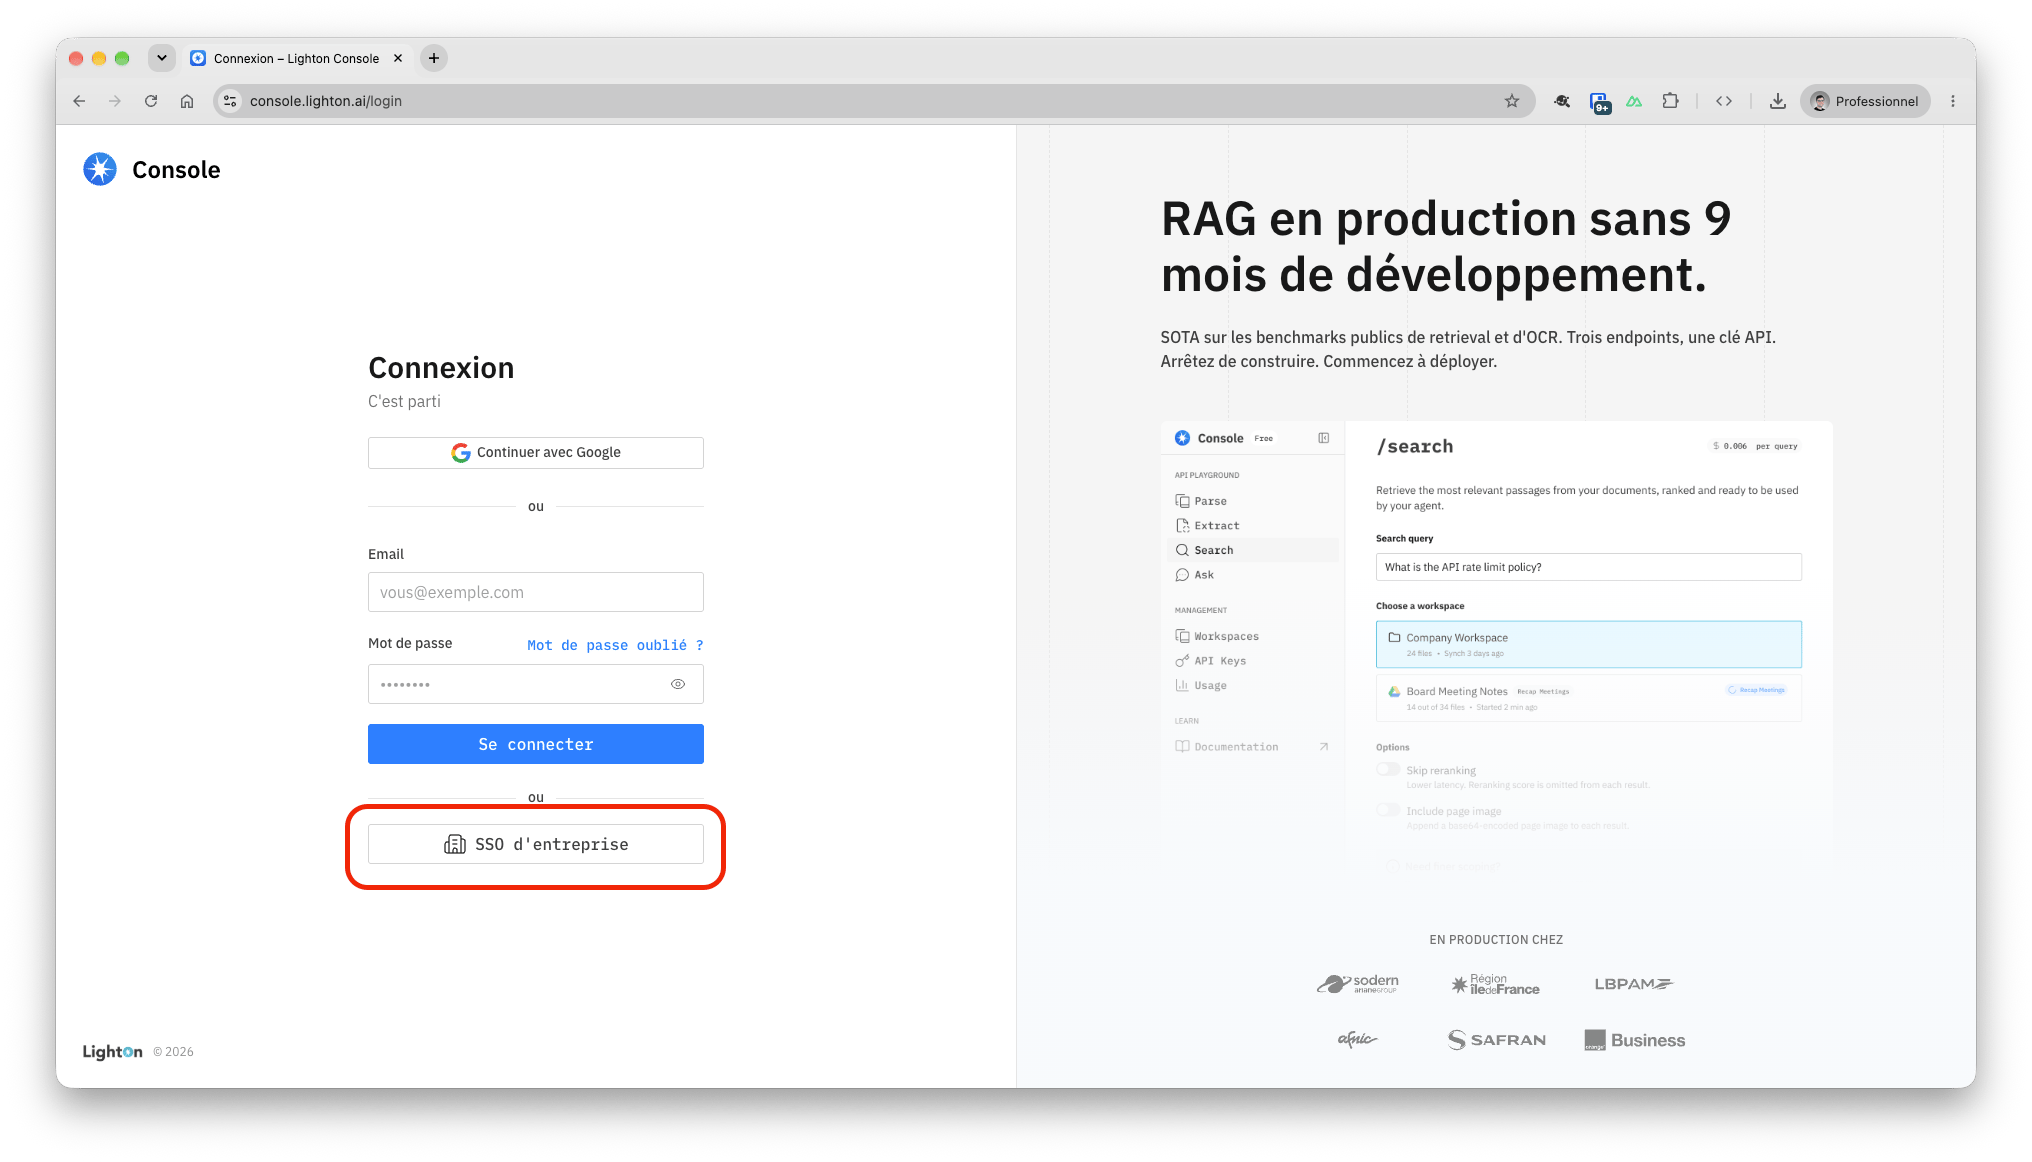
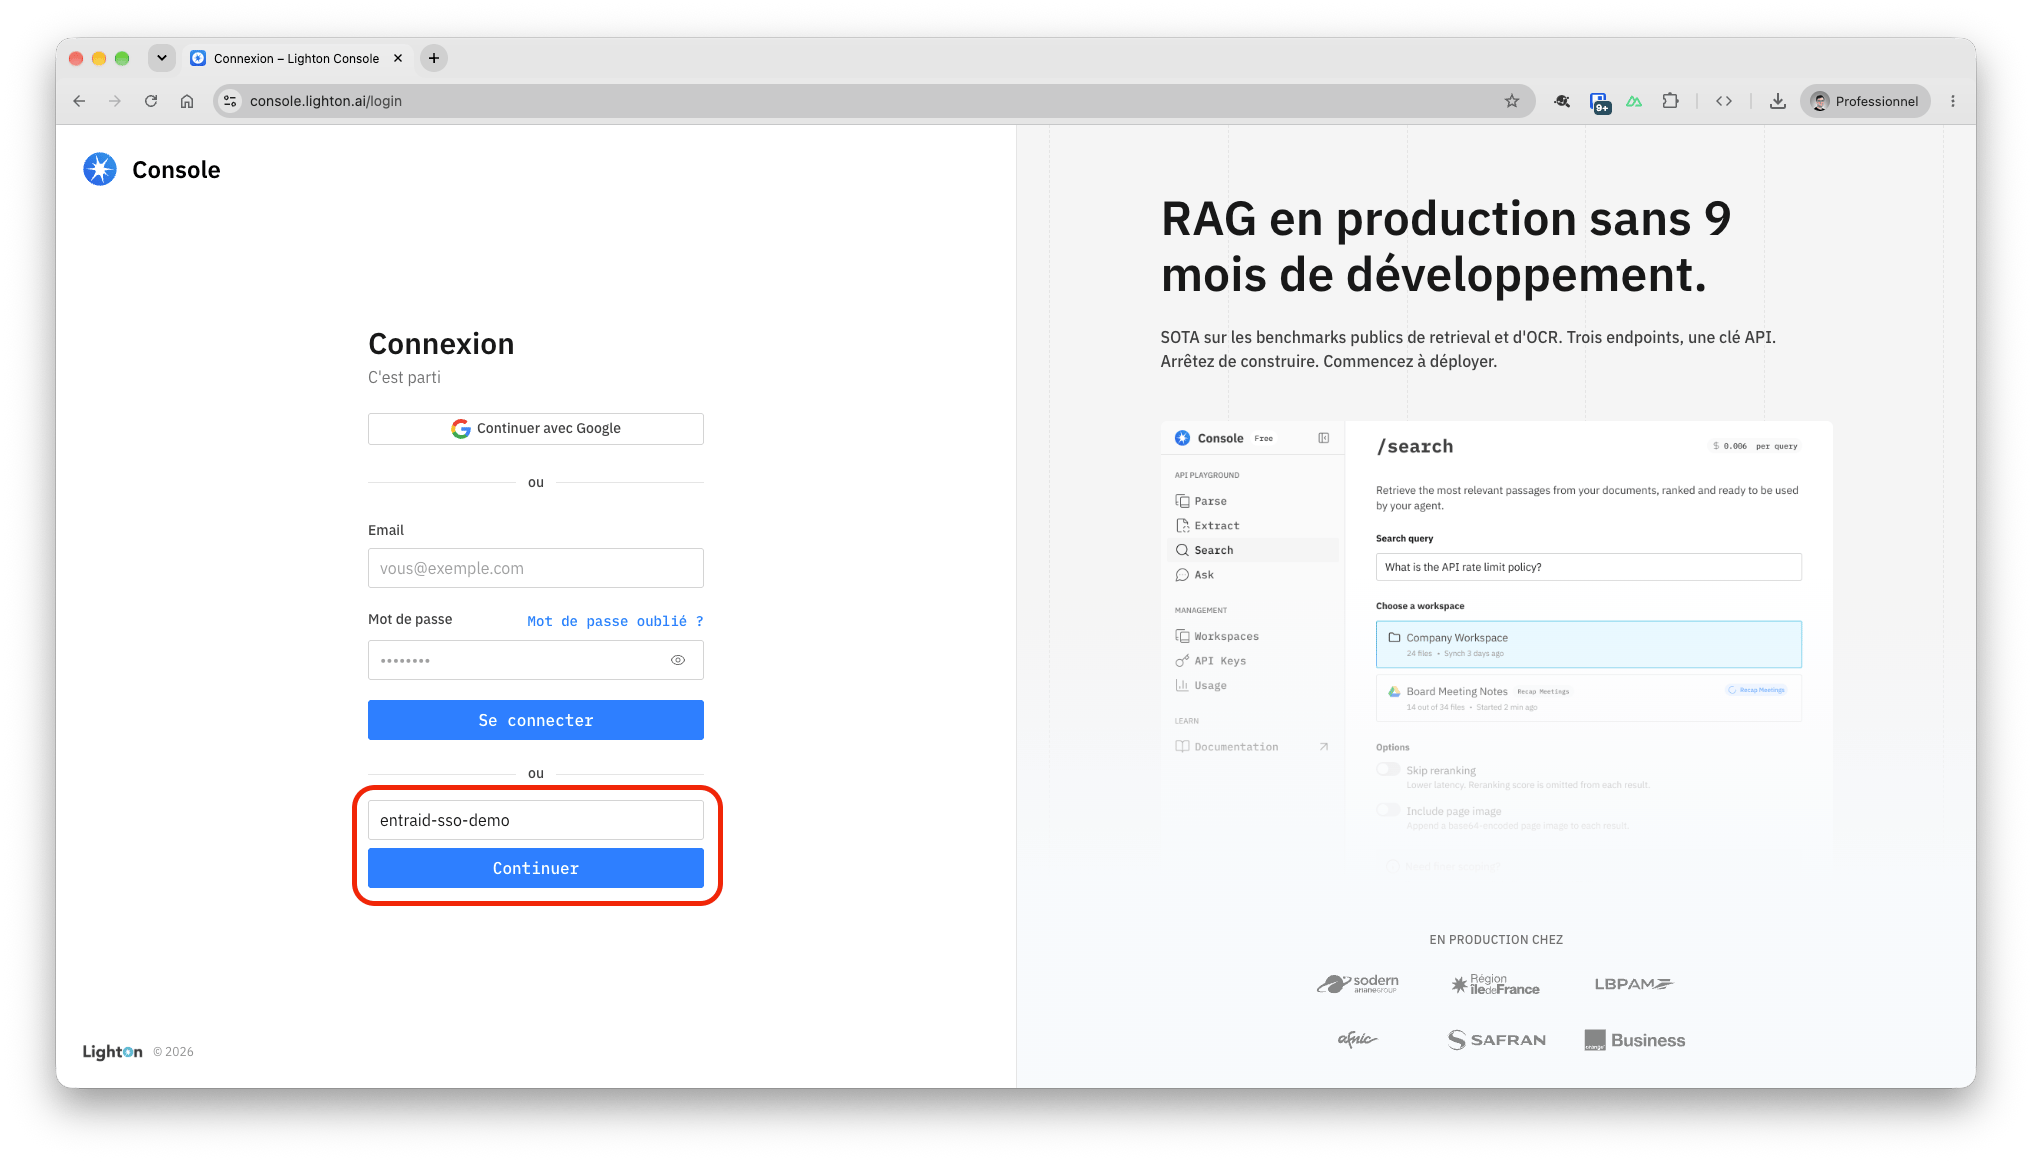
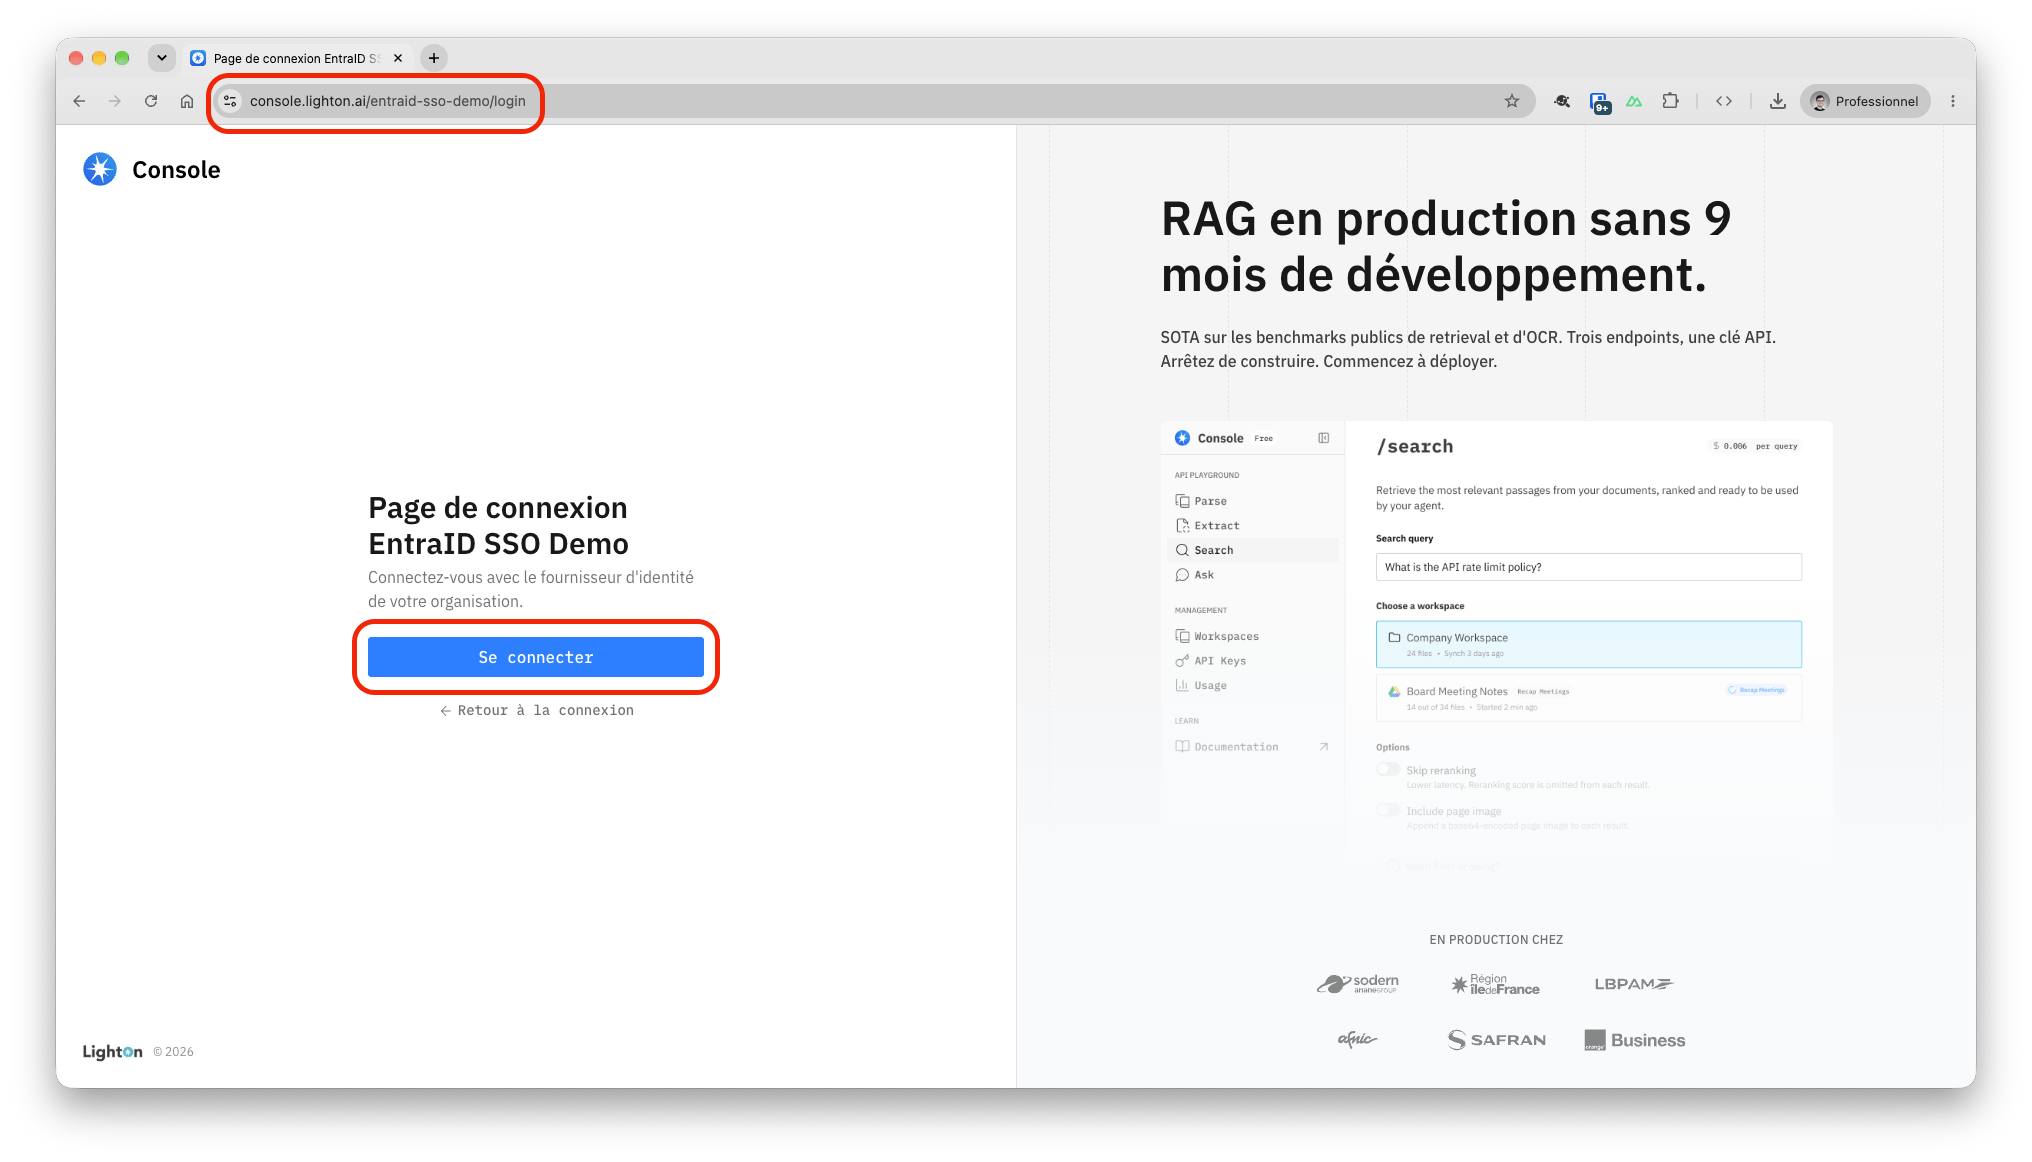
- In a private browser window, open the Console login page,
https://<console-host>/login, click onSSO d'entreprise, write slugified company name (My Companywould becomemy-company) then click onContinuerto arrive on the dedicated company SSO login page. Click onSe Connecterto start the login process with EntraID.
Later sign-ins match on the Entra object ID, not the email.
Debugging advice
If sign-in still fails, SAML-tracer shows what your browser exchanges with Microsoft and Console. It’s a free browser extension, and you don’t need admin rights to use it.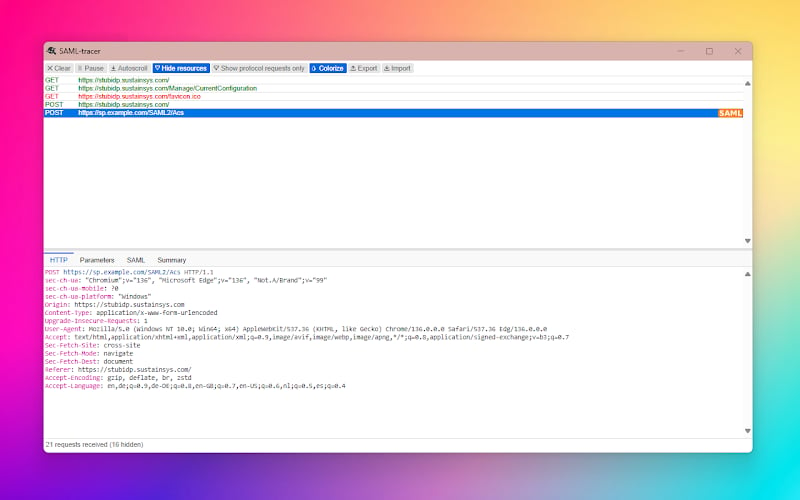
- Click the SAML-tracer icon in your browser toolbar to open its window.
- In your main browser window, open
https://<console-host>/<company-slug>/loginand sign in with Microsoft. - In SAML-tracer, select the rows tagged SAML and open the SAML tab to read each message.
Sharing the recording with support
Still stuck? Use SAML-tracer’s Export button and send the file to LightOn support with a short description of the problem.
A recording contains personal and security data: the user’s email and name, a signed sign-in message from Microsoft, and possibly session cookies. Handle it like a password:
- Record with a test account when you can.
- In the export dialog, choose to mask or remove cookie values.
- Send it only to LightOn support, through your usual support channel. Never post it in a public forum, a shared chat or a ticket that other people can read.
- After recording, sign out of Console and delete the file once the issue is resolved.