

- Before you start (Console admin): check that SCIM is enabled, then create a dedicated Company Admin account and an API key for it.
- Create the enterprise application (Entra admin): a non-gallery application, or reuse the one you use for SSO.
- Connect Entra to Console (Entra admin): enter the tenant URL and the API key, then test the connection.
- Map the user attributes (Entra admin): keep six rows, change
externalIdtoobjectId, delete the rest. - Choose who is provisioned and start (Entra admin): assign users or groups, test one user, start provisioning.
1. Before you start (Console side)
- Check that SCIM is enabled. It is on by default, at two levels:
- the instance, through the
SCIM_INSTANCE_ACTIVATIONconfig key; - your company, through the Activate SCIM setting of the company in the Django admin.
- the instance, through the
- Create a dedicated account for Entra, for example
scim-entra@your-company.com, with the Company Admin role. Entra acts as this account: it needs to create, edit and delete users and groups. Use a dedicated account so that nobody deactivates it by accident. - Create an API key for that account. Sign in as the account and create the key from the API keys page. Do not restrict the key to workspaces. Copy the key: you paste it into Entra in step 3.
2. Create the enterprise application in Entra
- In the Microsoft Entra admin center, go to Identity > Applications > Enterprise applications.
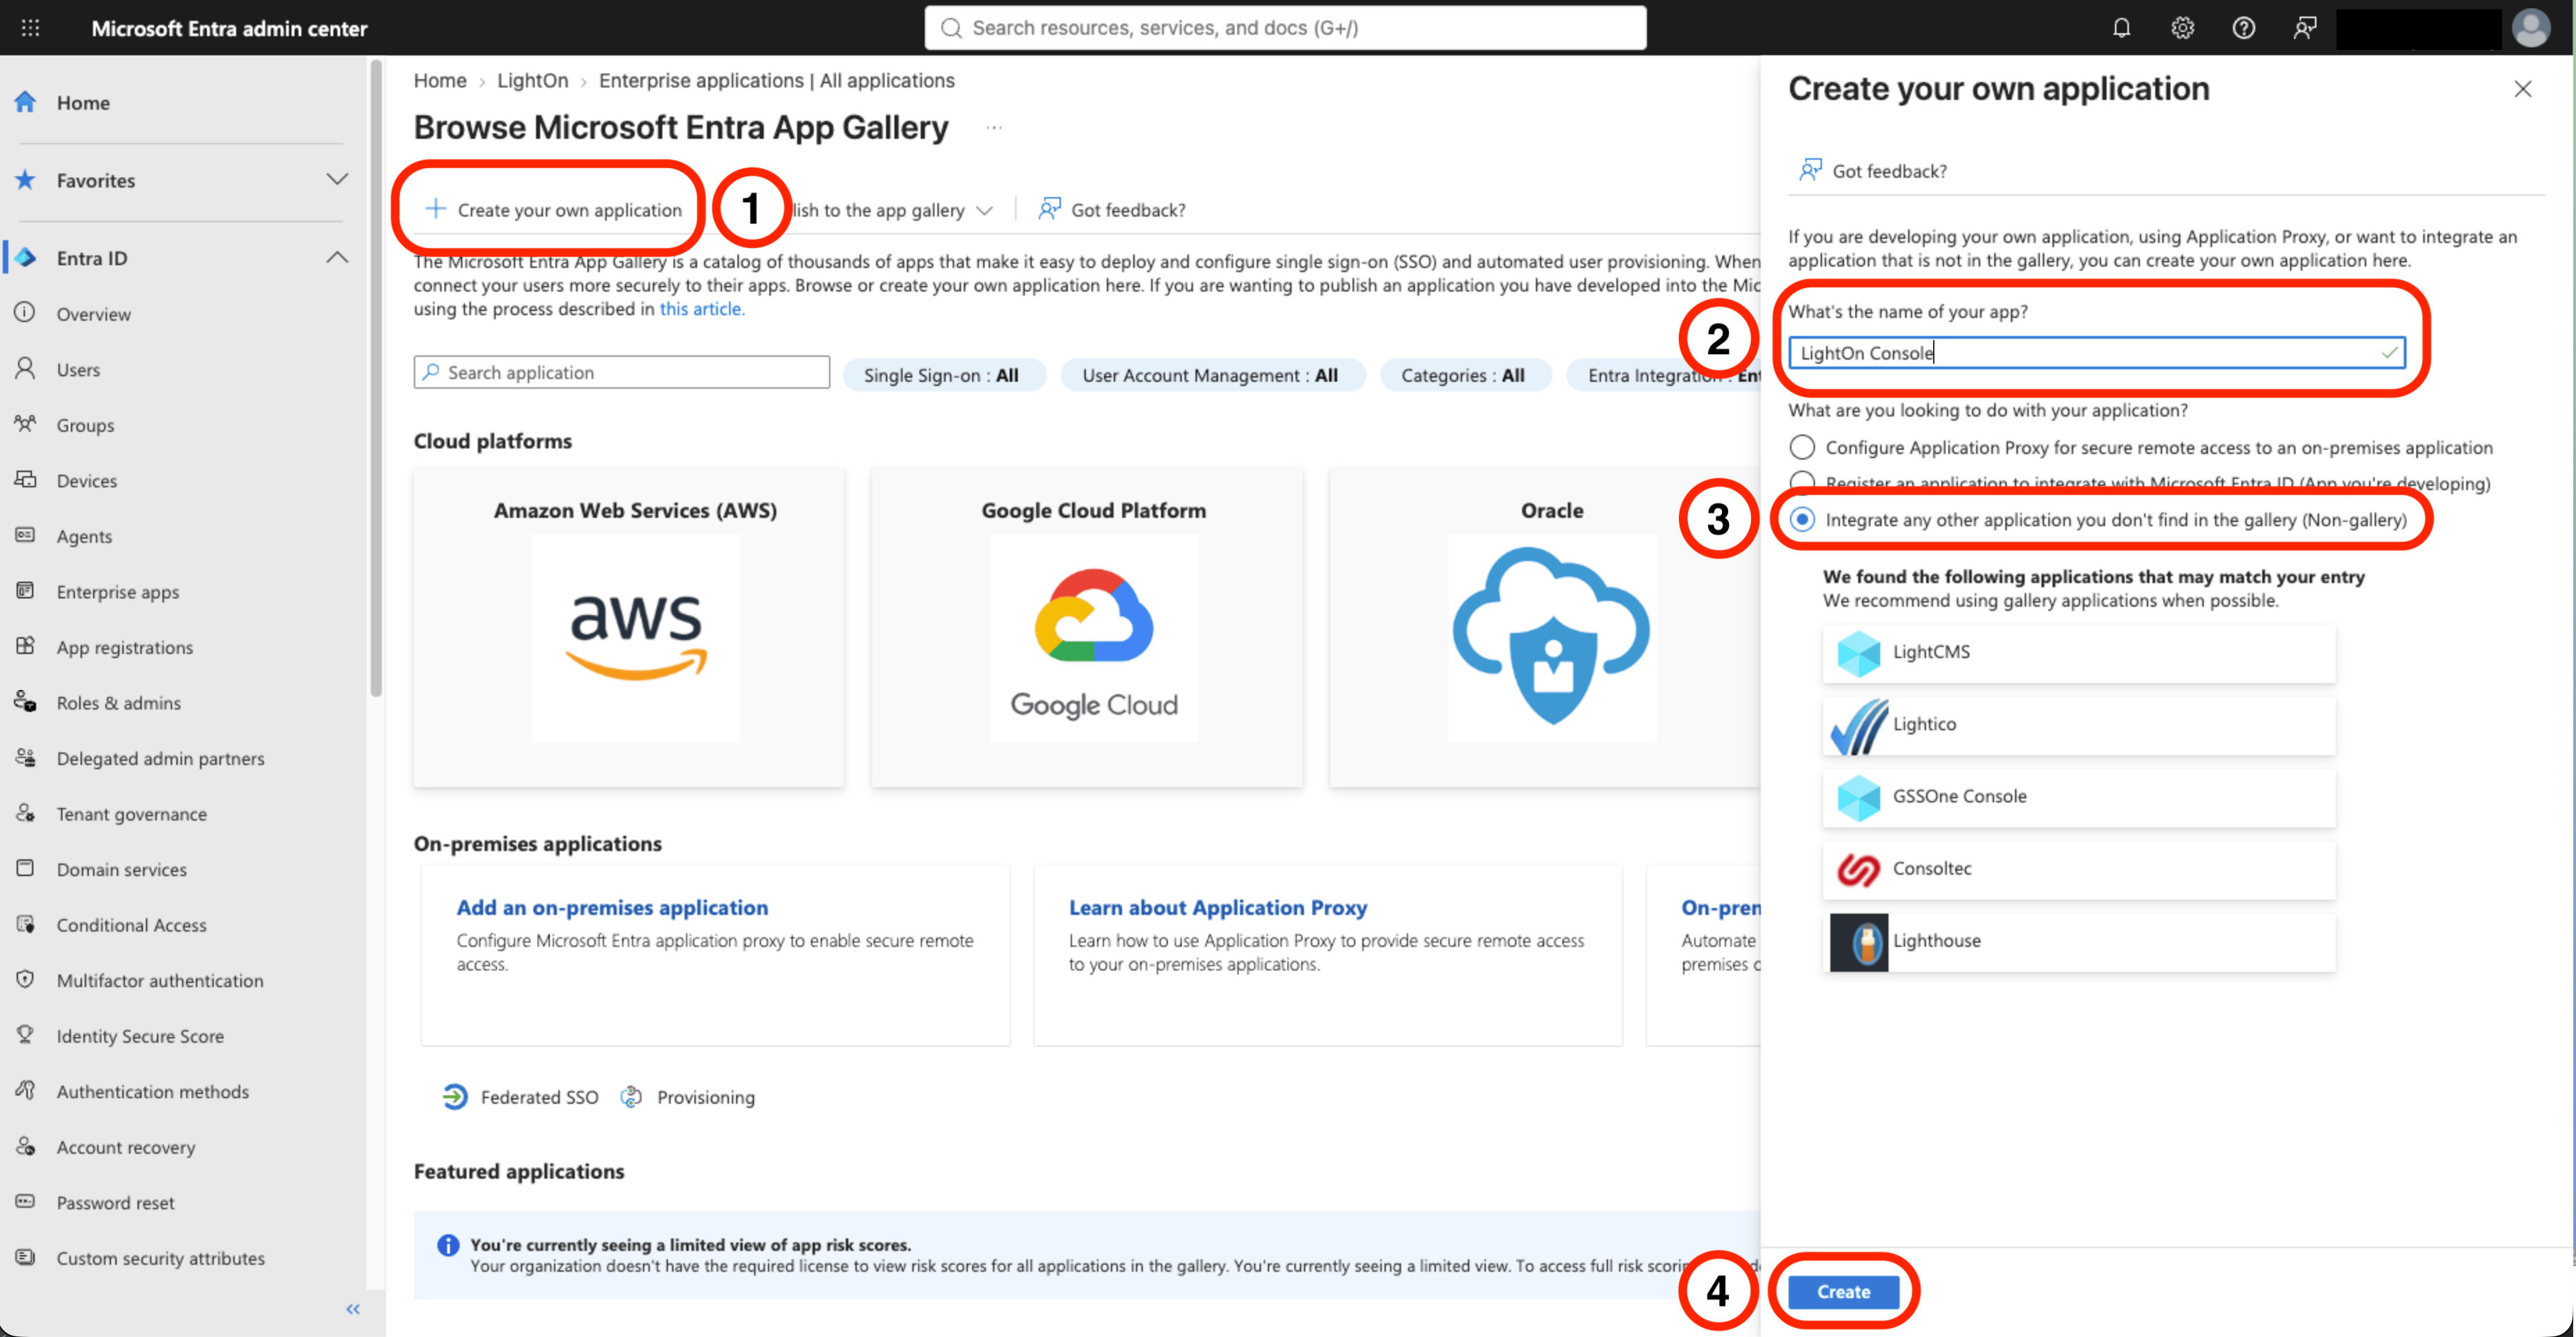
- Click New application, then Create your own application.
- Enter a name (for example
Console), select Integrate any other application you don’t find in the gallery (Non-gallery), then click Create.
If you already use an enterprise application for Console SSO, add provisioning to that one instead of creating a new one.
3. Connect Entra to Console
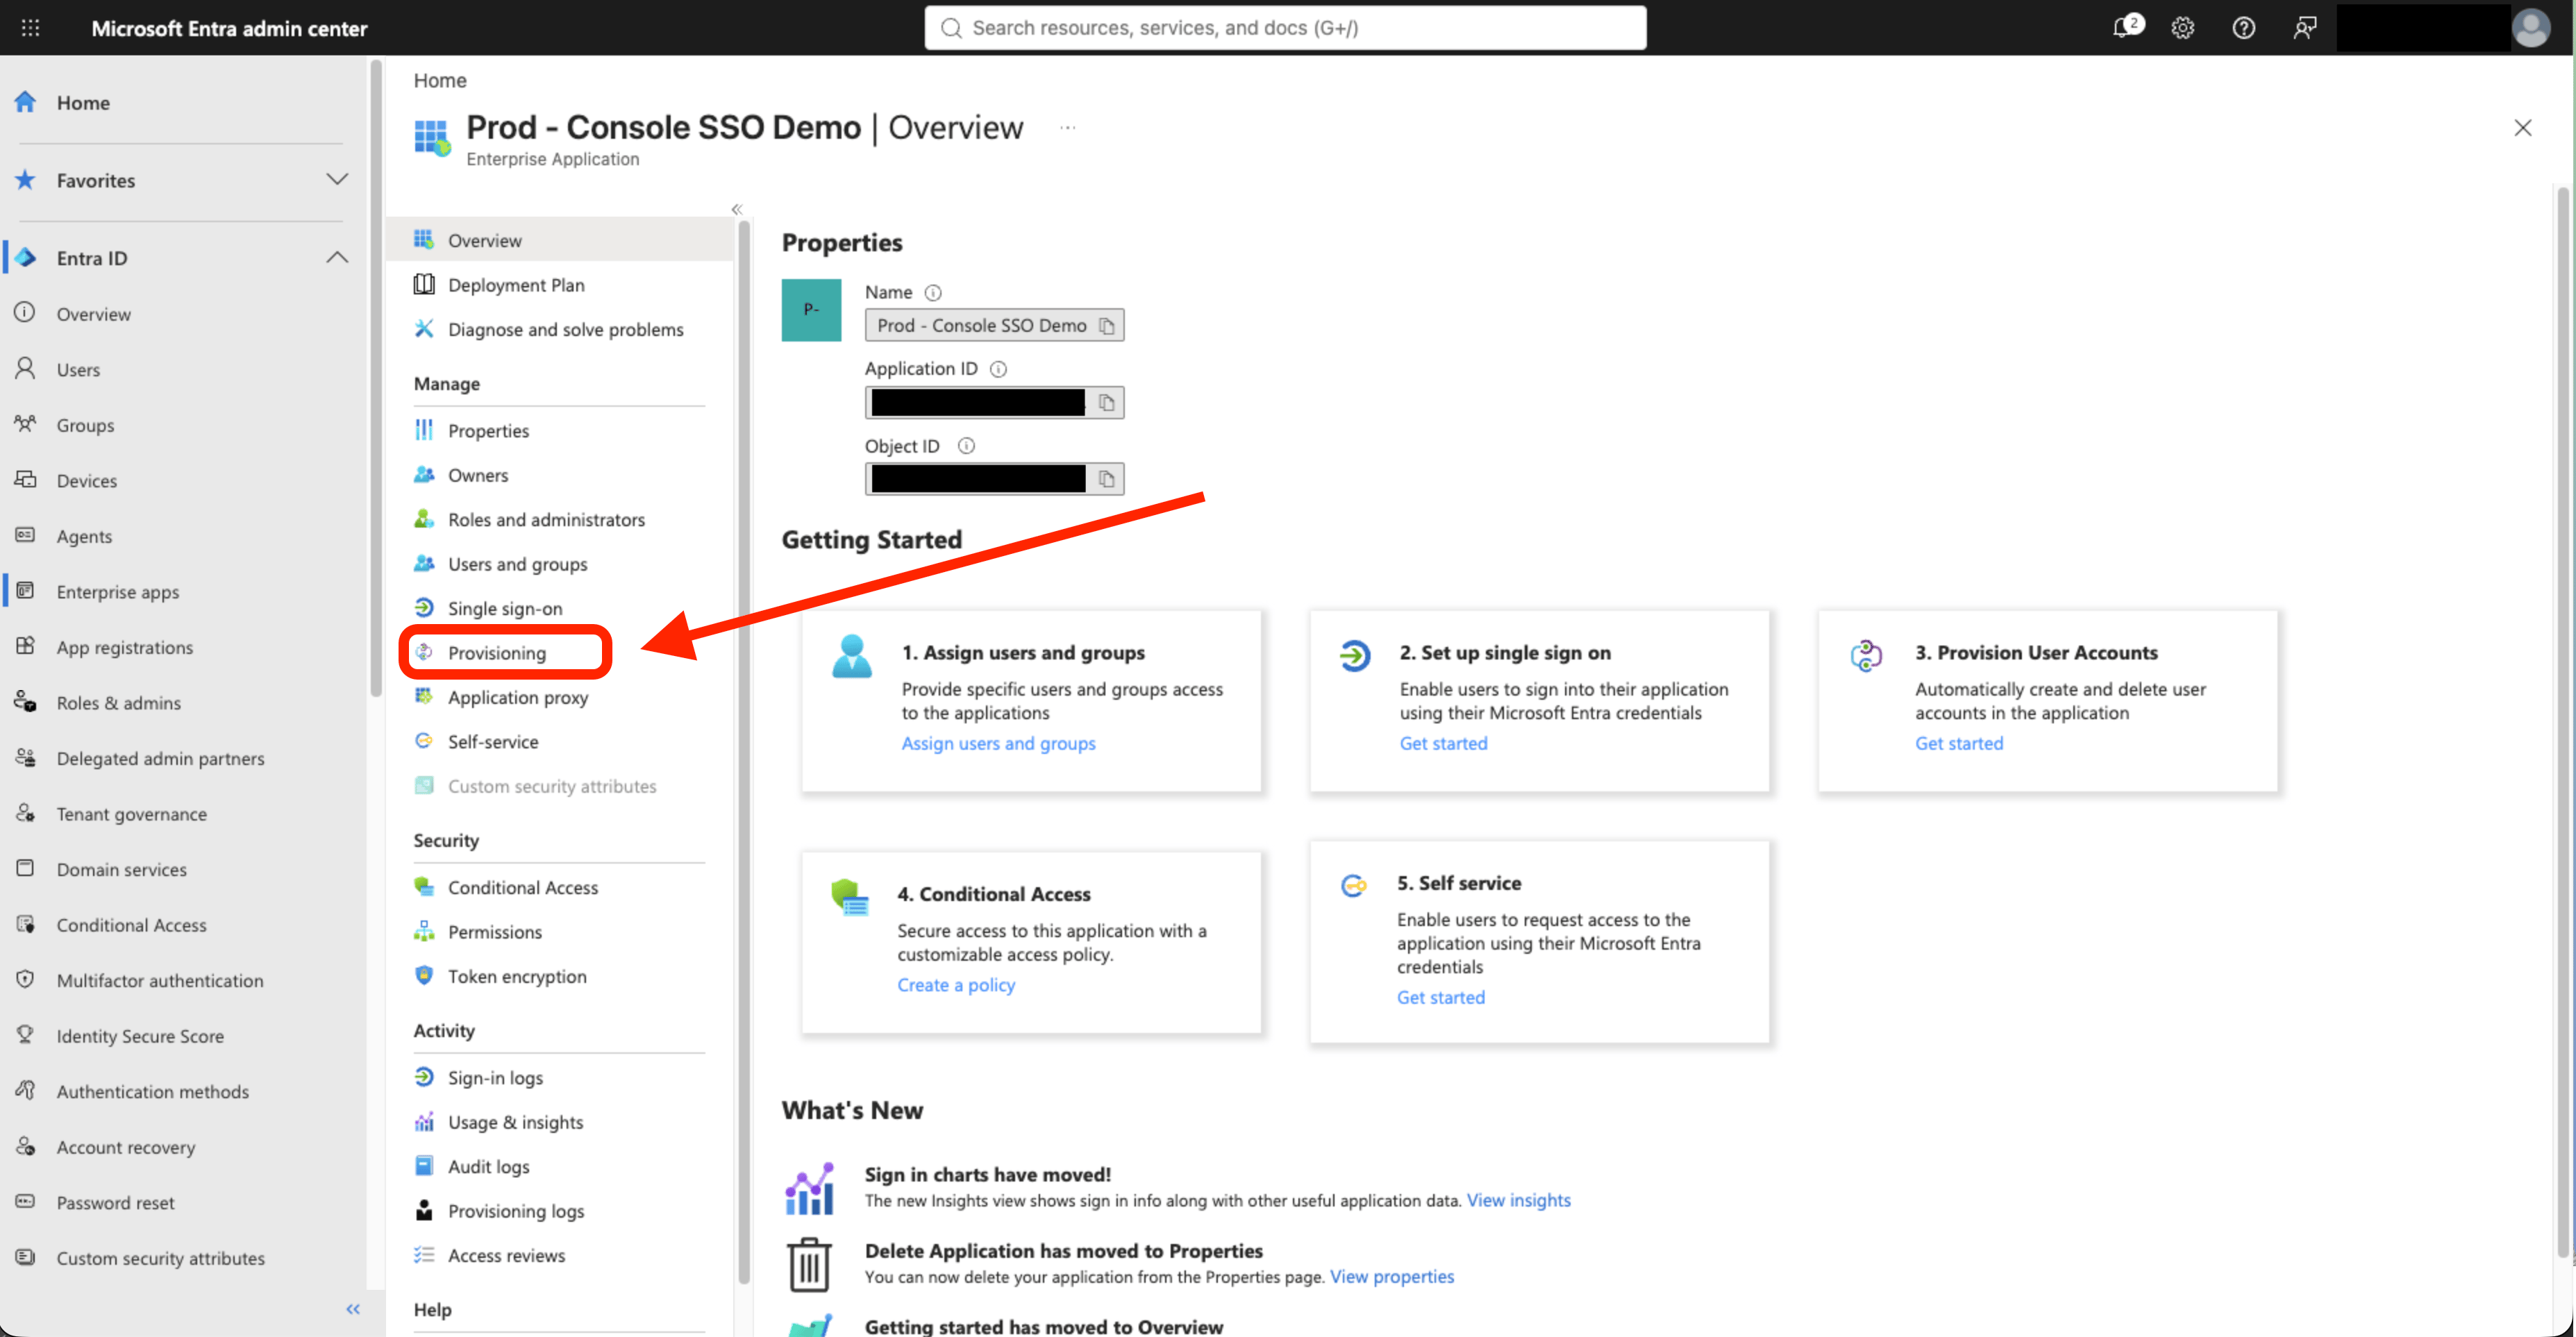
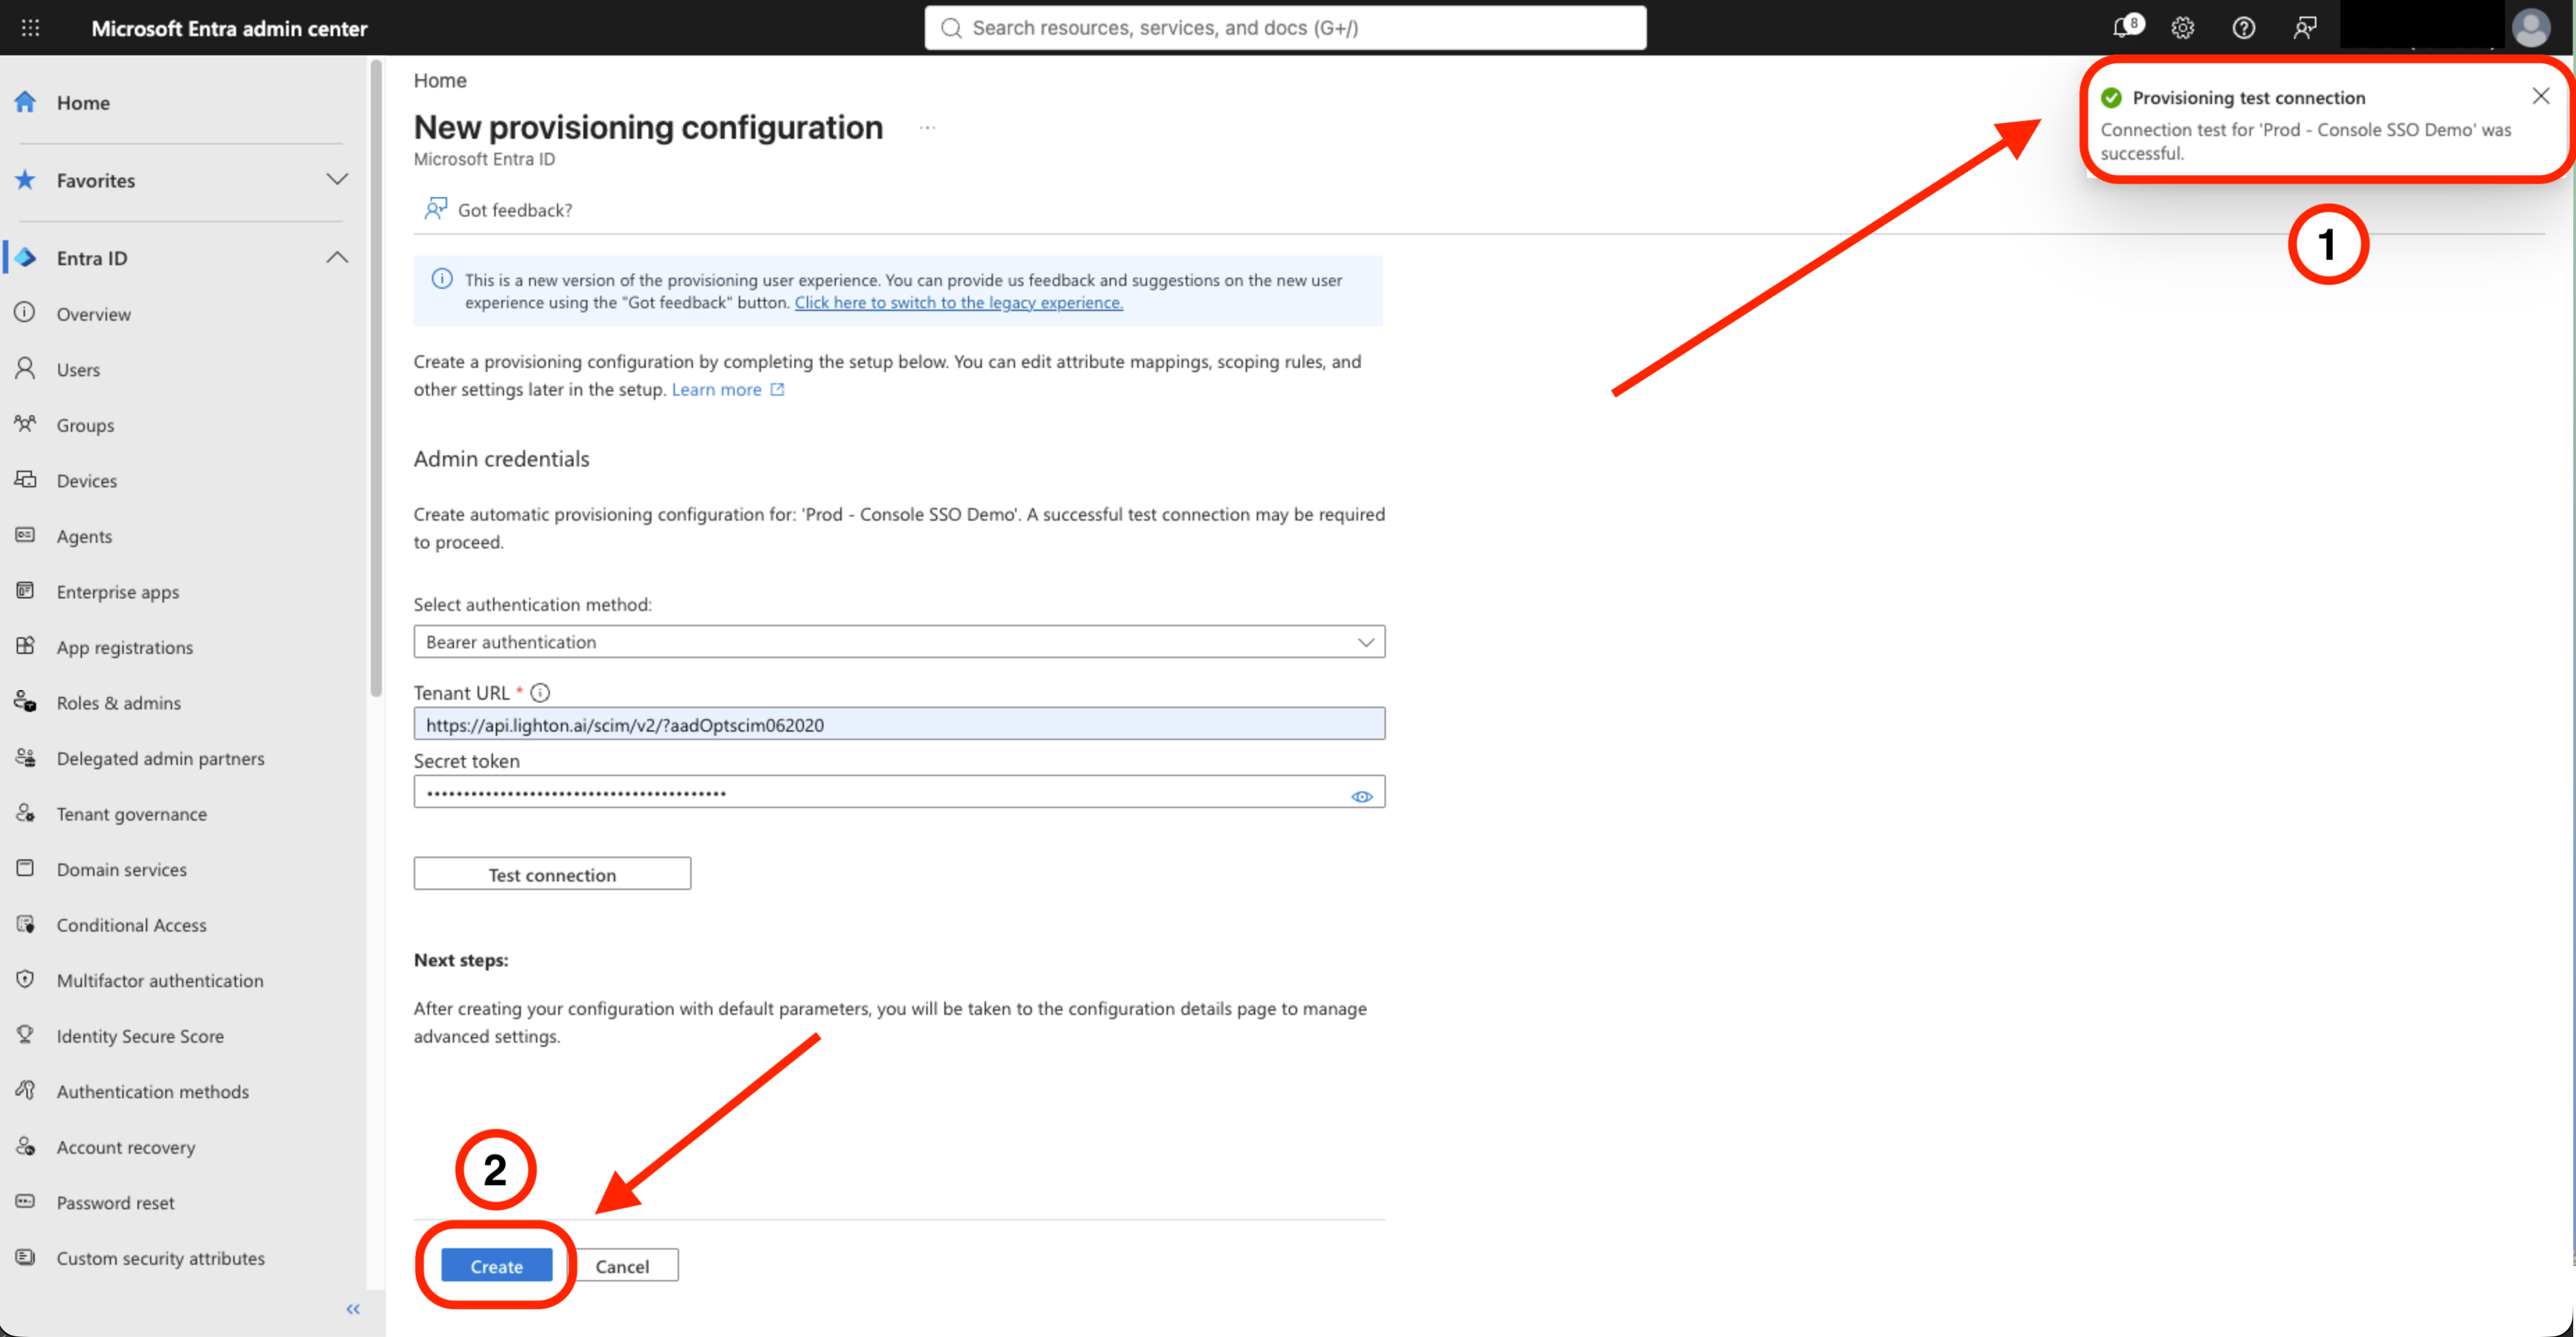
- In the application, open Provisioning and click + New configuration.
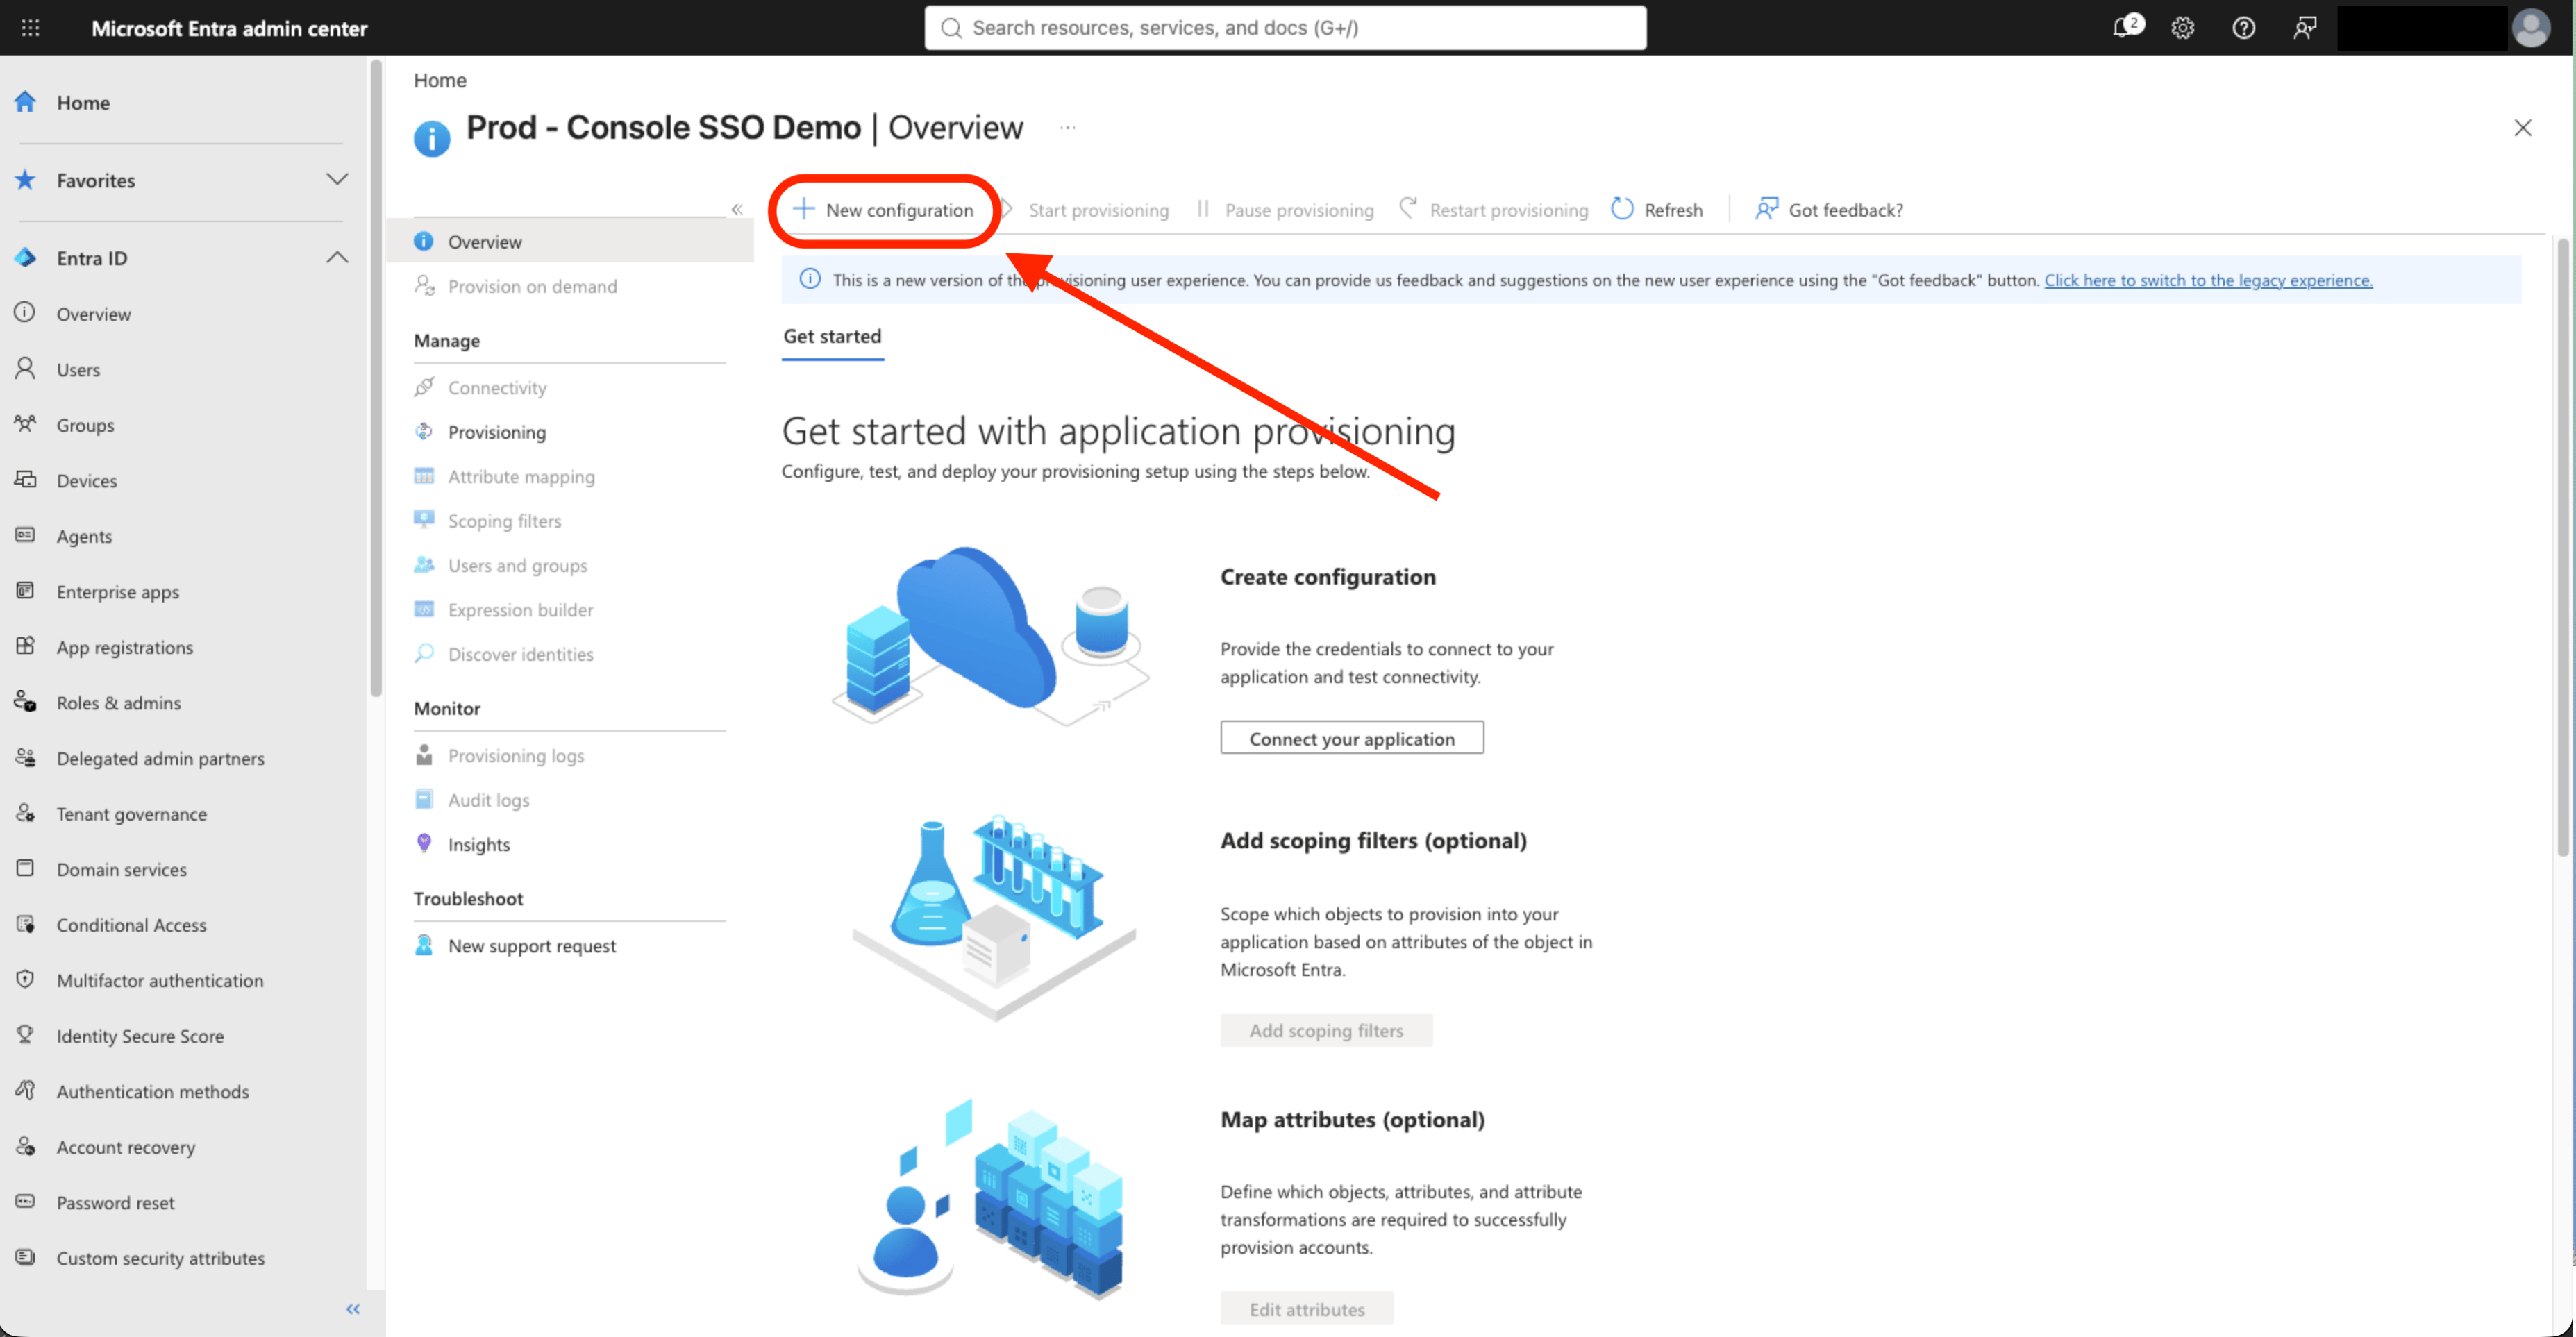
- Fill in the admin credentials:
| Field | Value |
|---|---|
| Tenant URL | https://<console-domain>/scim/v2/?aadOptscim062020 |
| Secret token | The API key created in step 1 |
<console-domain>isapi.lighton.aion the LightOn SaaS, or your own domain on-premise.- Keep the
?aadOptscim062020suffix: it makes Entra send updates in the standard SCIM format. Microsoft documentation
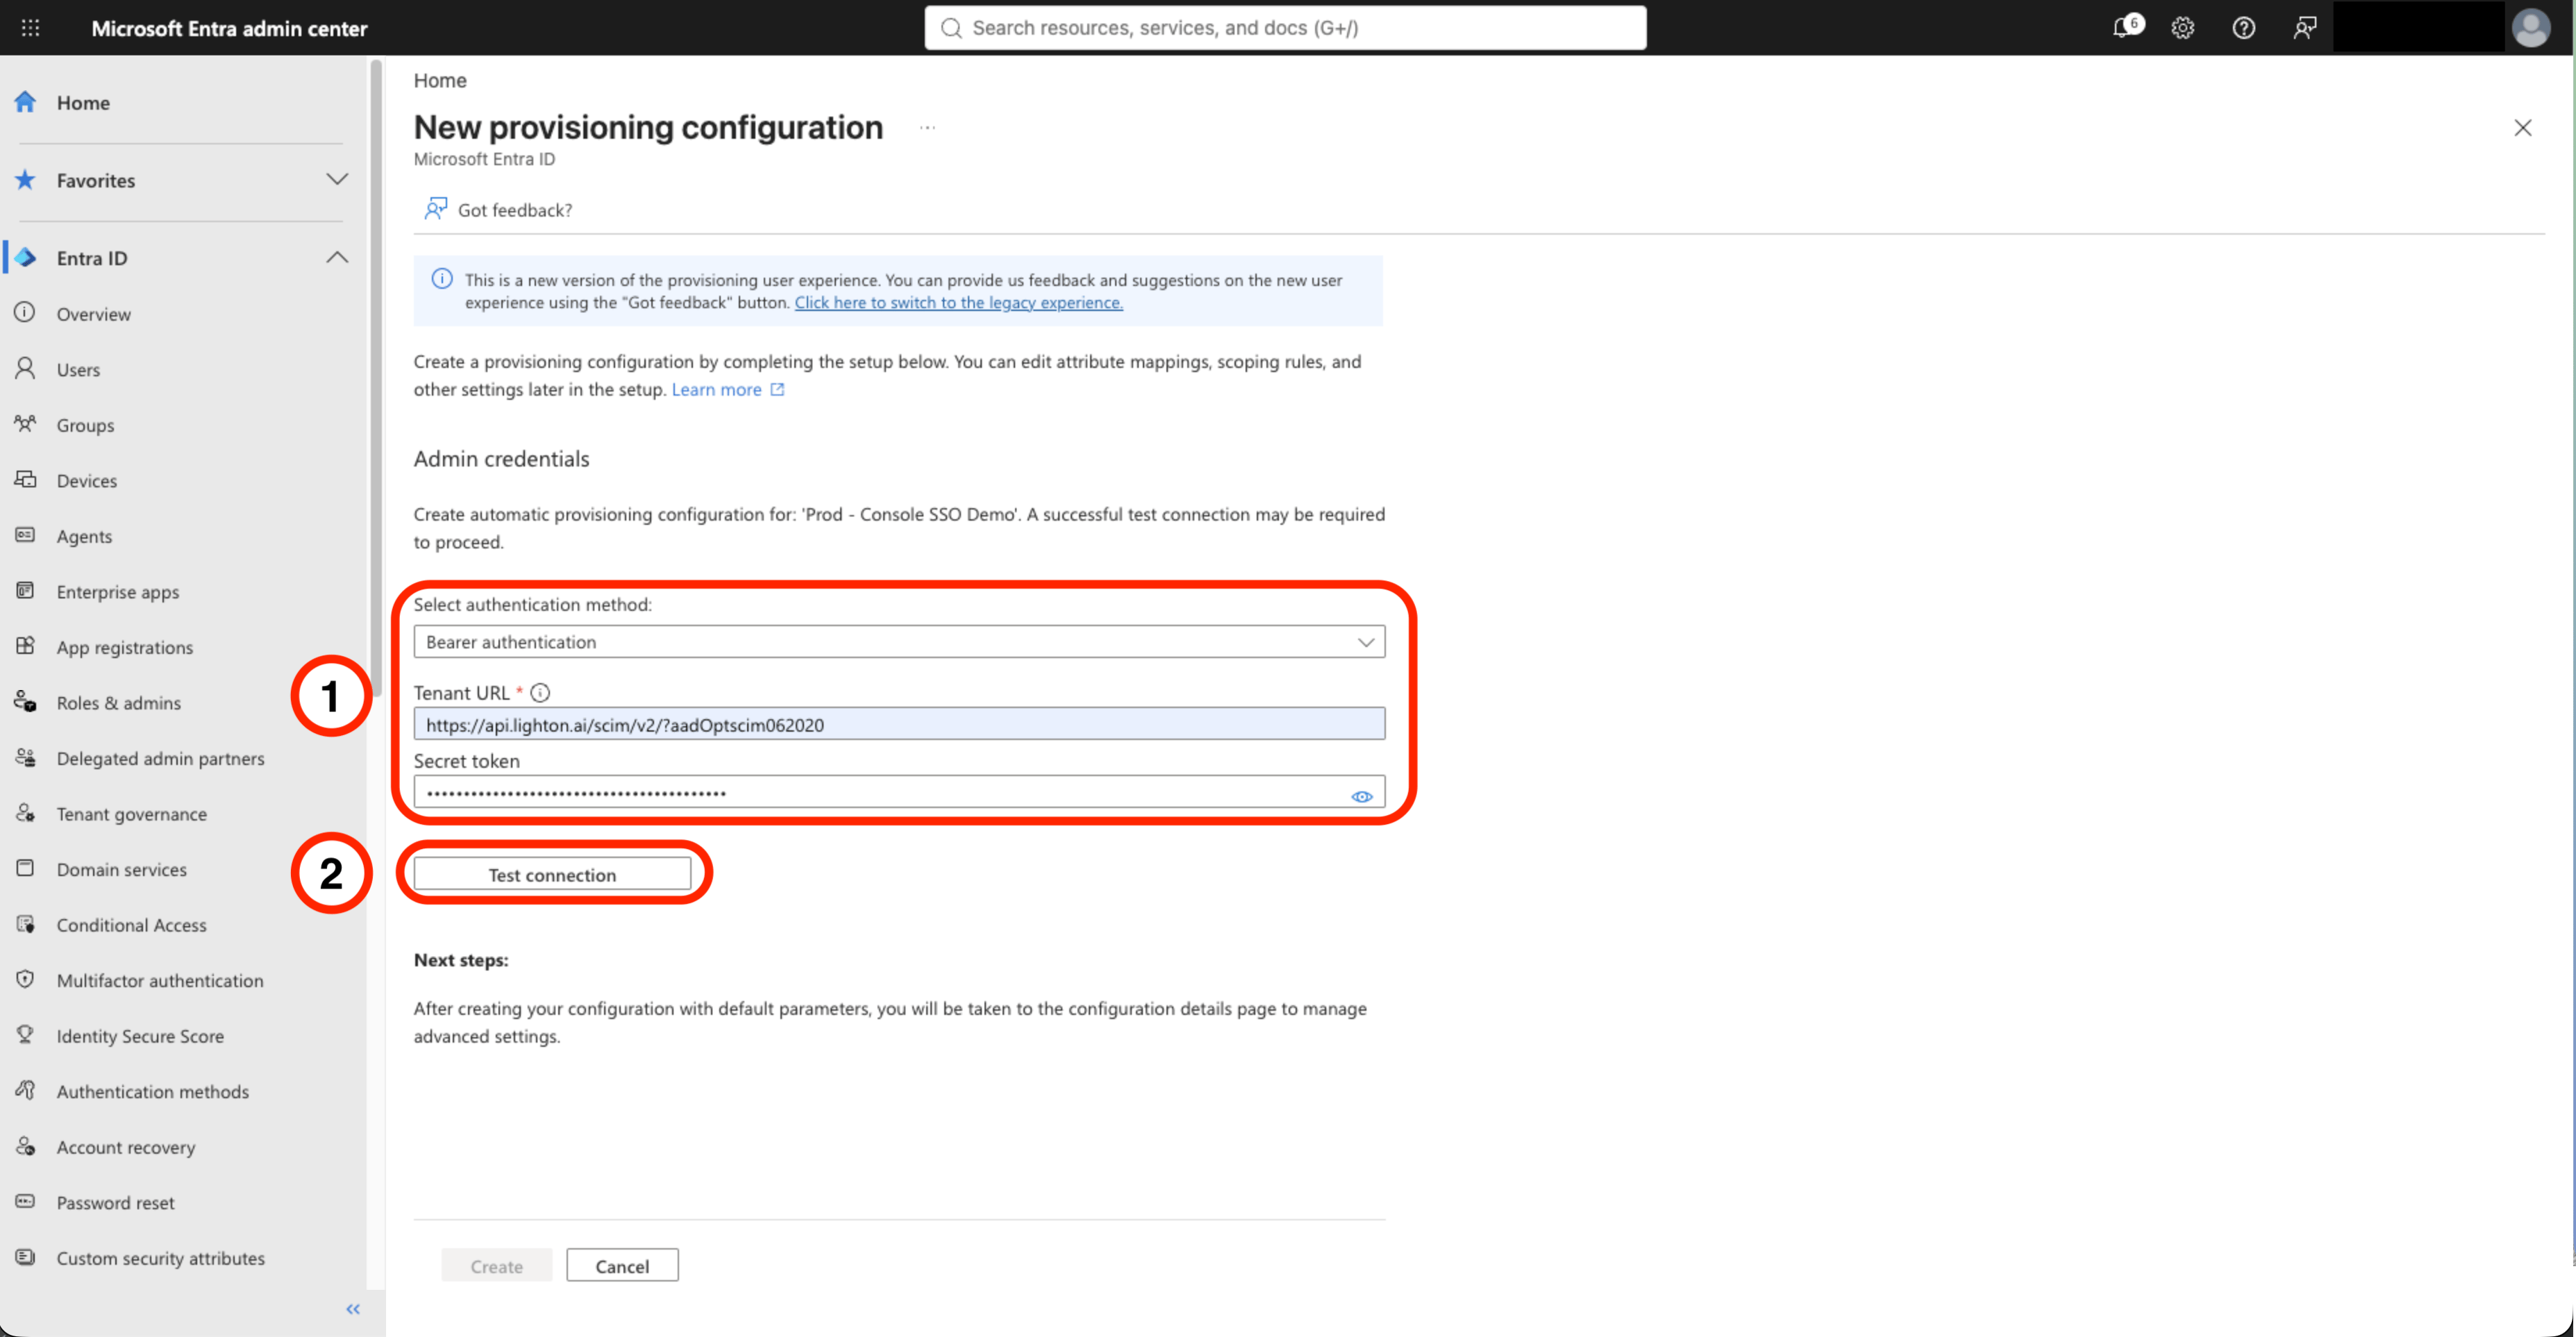
- Click Test connection. A success means Console is reachable, the key is valid and SCIM is on.
- Click Create.
On the LightOn SaaS, ask LightOn support if the connection test in step 3 returns
403.4. Map the user attributes
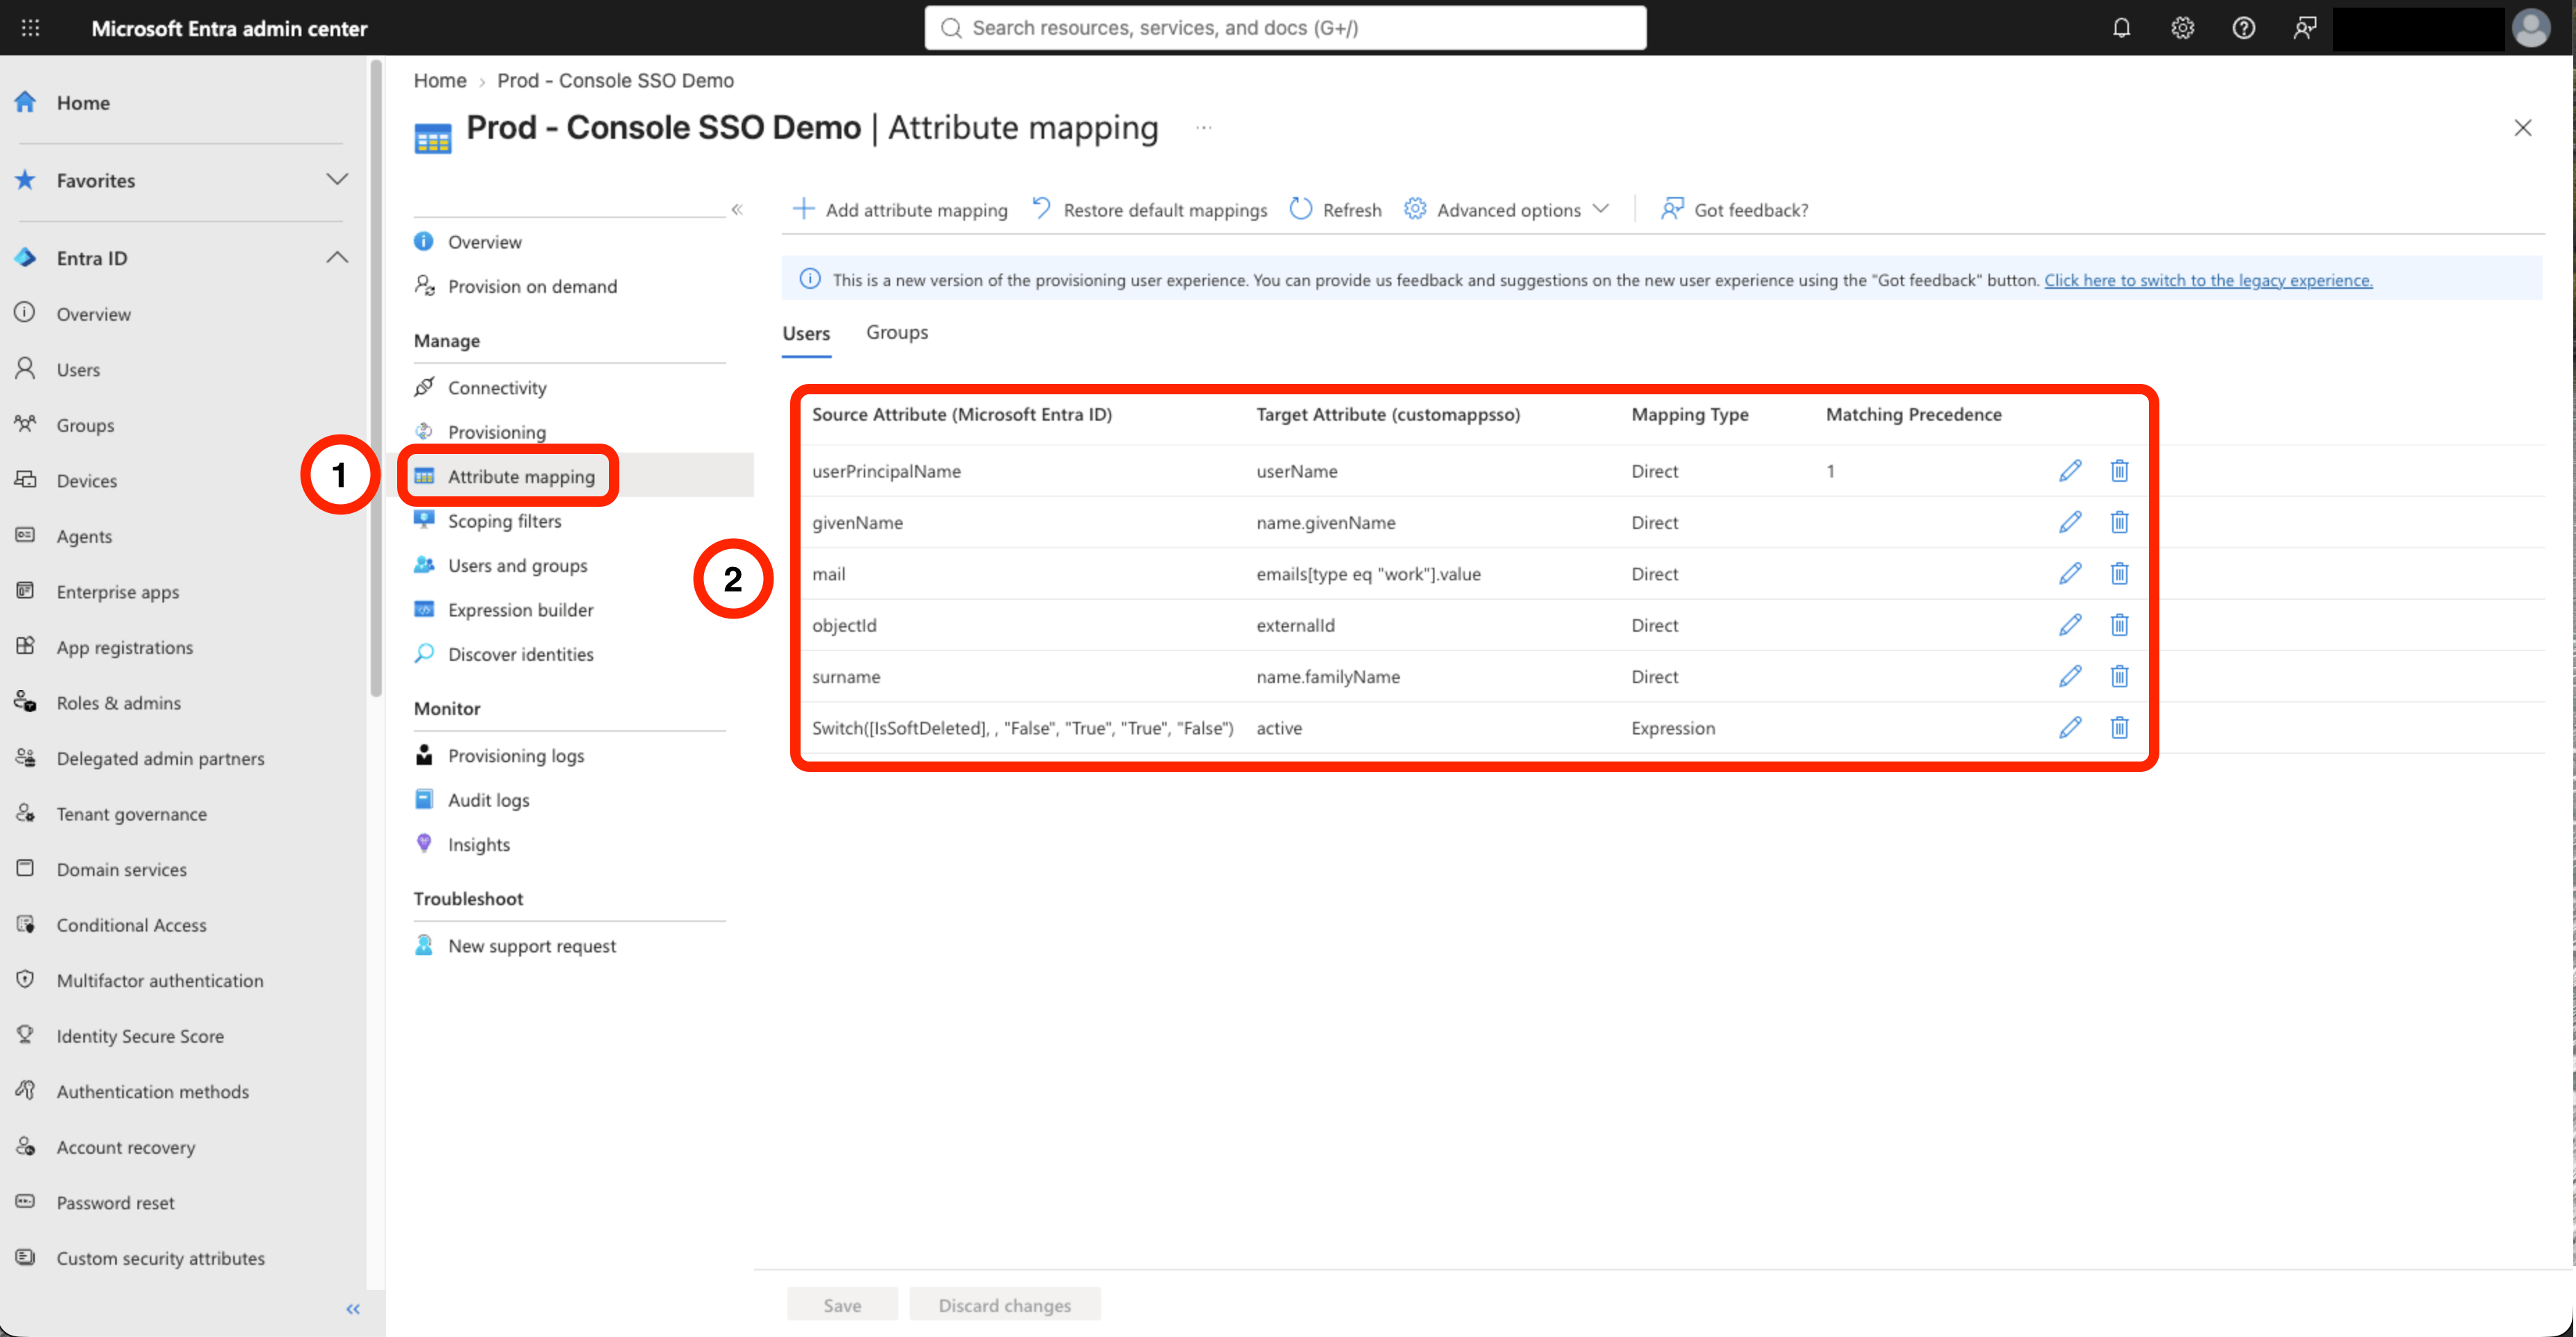
Entra’s default mapping sends attributes Console does not store. Console rejects any update that contains one of them, including the supported changes sent in the same request. Keep only the six rows below.- Open Provisioning > Attribute mapping > Provision Microsoft Entra ID Users.
- Make sure the mapping holds exactly these rows:
| Source Attribute (Microsoft Entra ID) | Console attribute (target) | Notes |
|---|---|---|
userPrincipalName | userName | Entra’s default. Required. Matching Precedence = 1 |
givenName | name.givenName | |
mail or Coalesce([mail], [userPrincipalName]) if some users have no mail and your UPNs are real email addresses. | emails[type eq "work"].value | Required. |
objectId | externalId | Required. Entra’s default is mailNickname: change it to objectId. |
surname | name.familyName | |
Switch([IsSoftDeleted], , "False", "True", "True", "False") | active | Entra’s default. Keep it. |
- Delete every other row, in particular:
displayName,title,preferredLanguage,name.formatted,phoneNumbers[...],addresses[...],rolesand everyurn:ietf:params:scim:schemas:extension:enterprise:2.0:User:...row (employeeNumber,department,manager…). - Click Save.
Console needs an email to create an account, and an email can belong to only one Console account.
5. Choose who is provisioned and start
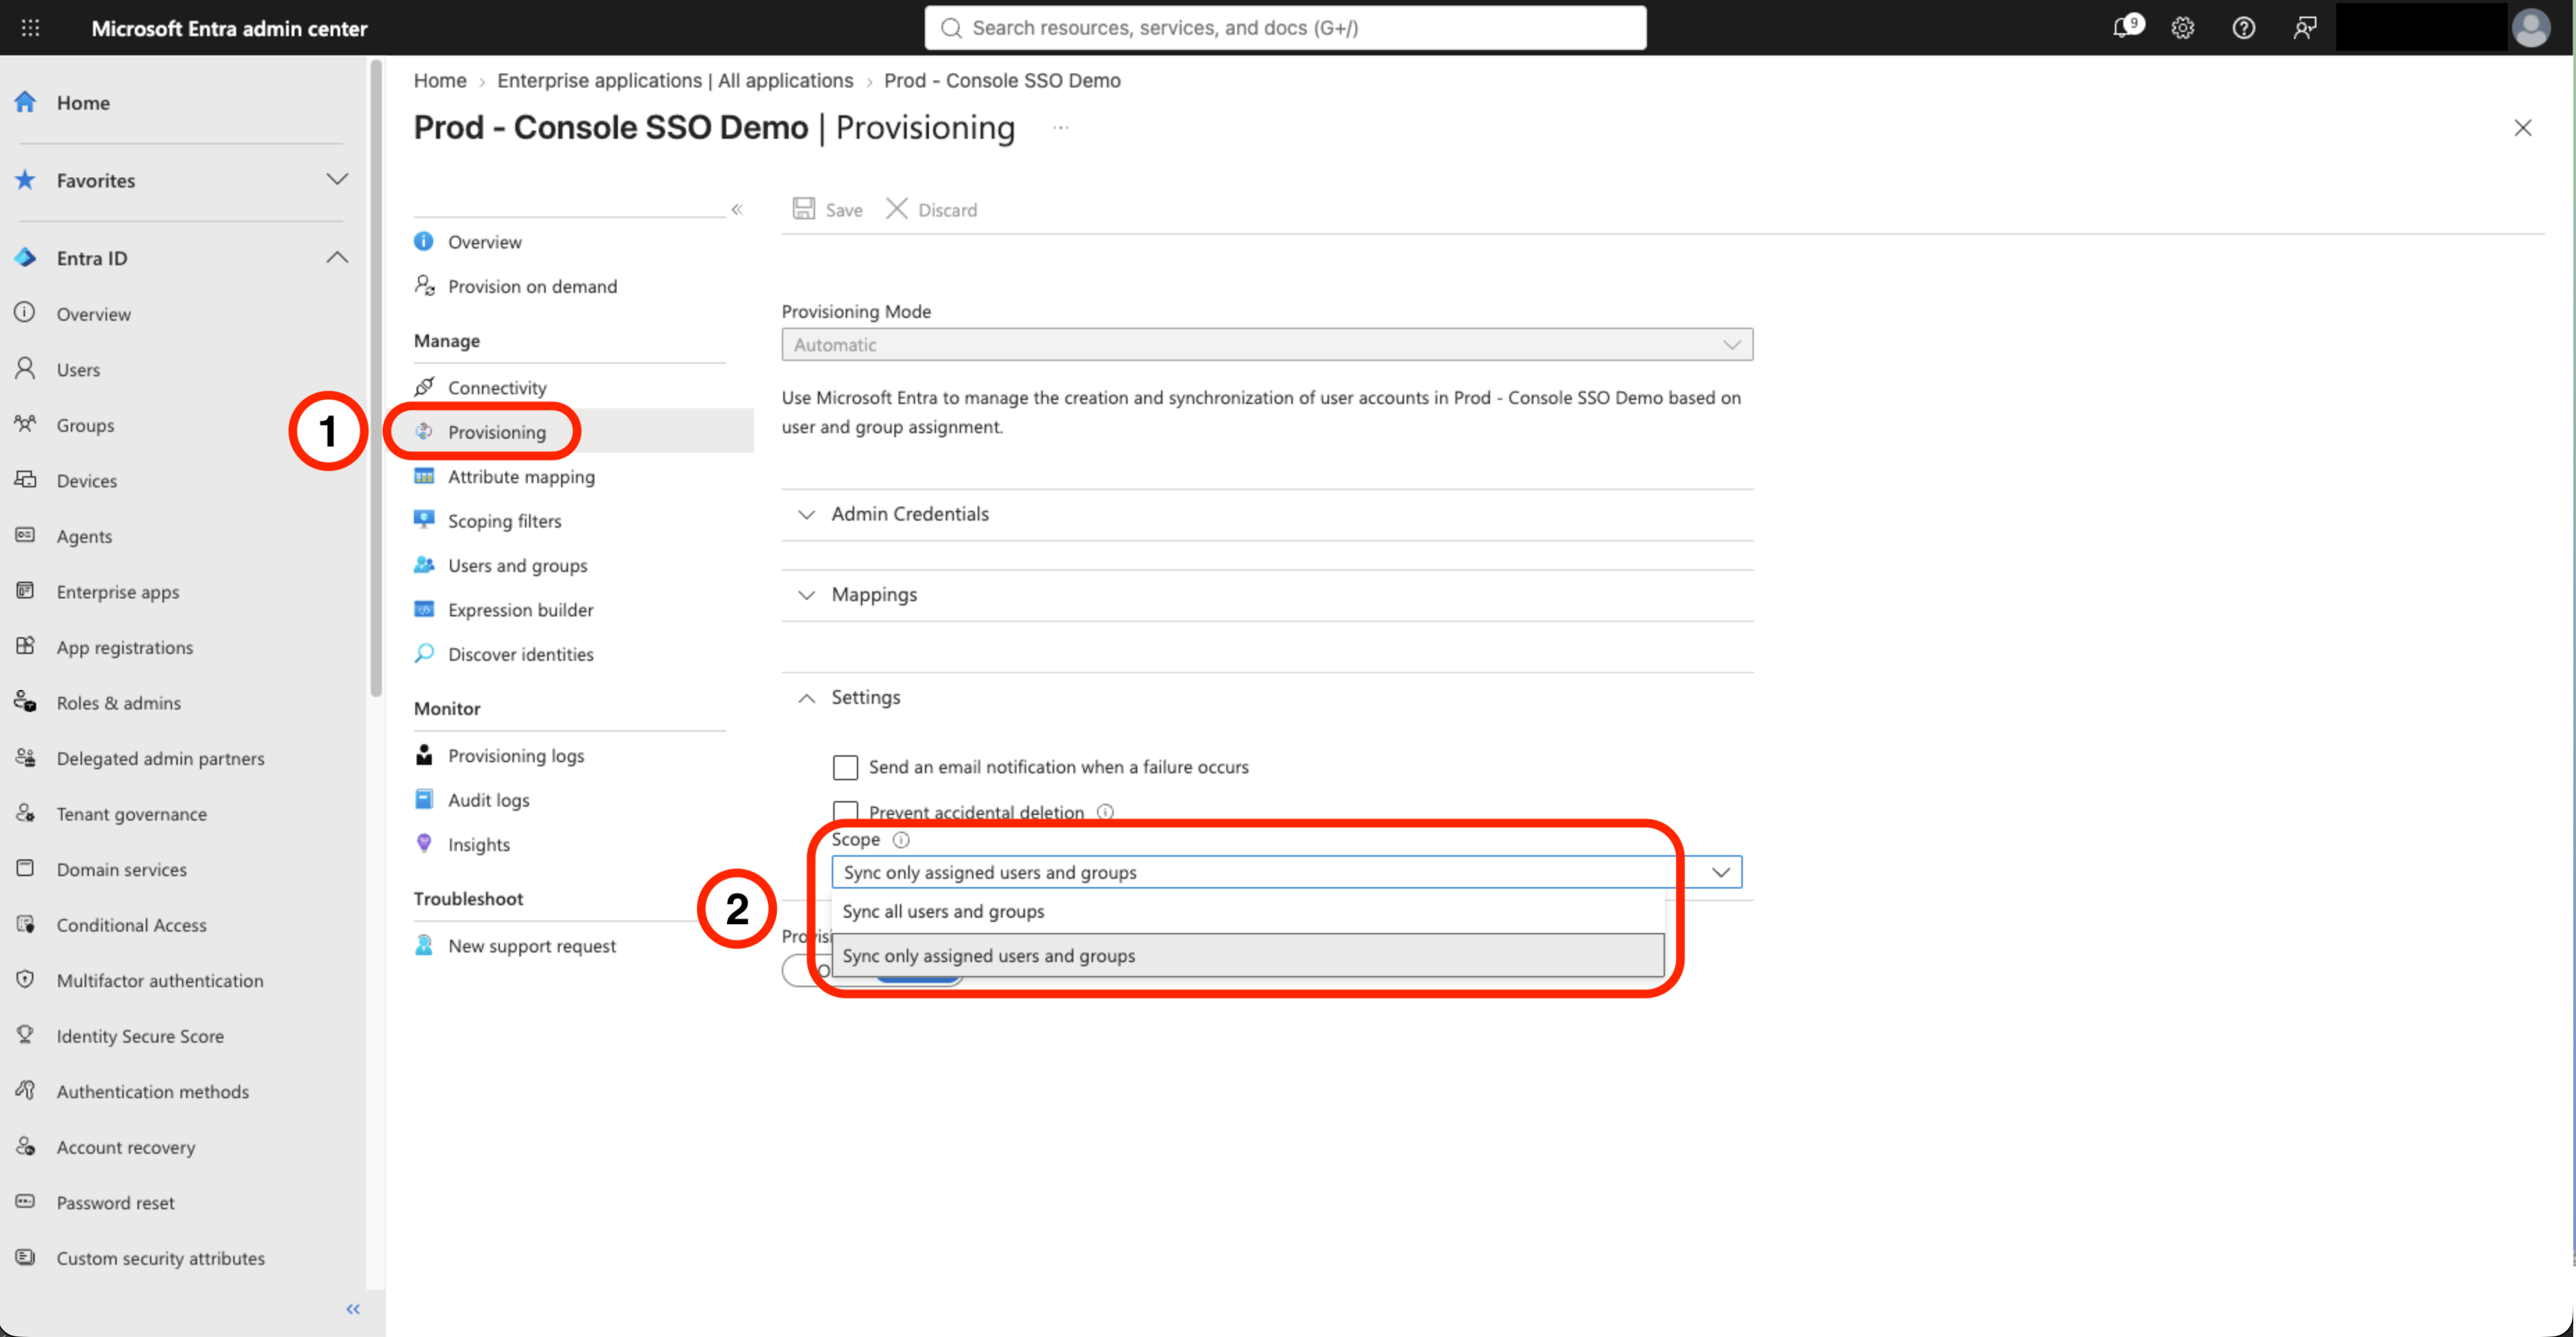
- Open Provisioning > Settings and set Scope to Sync only assigned users and groups.
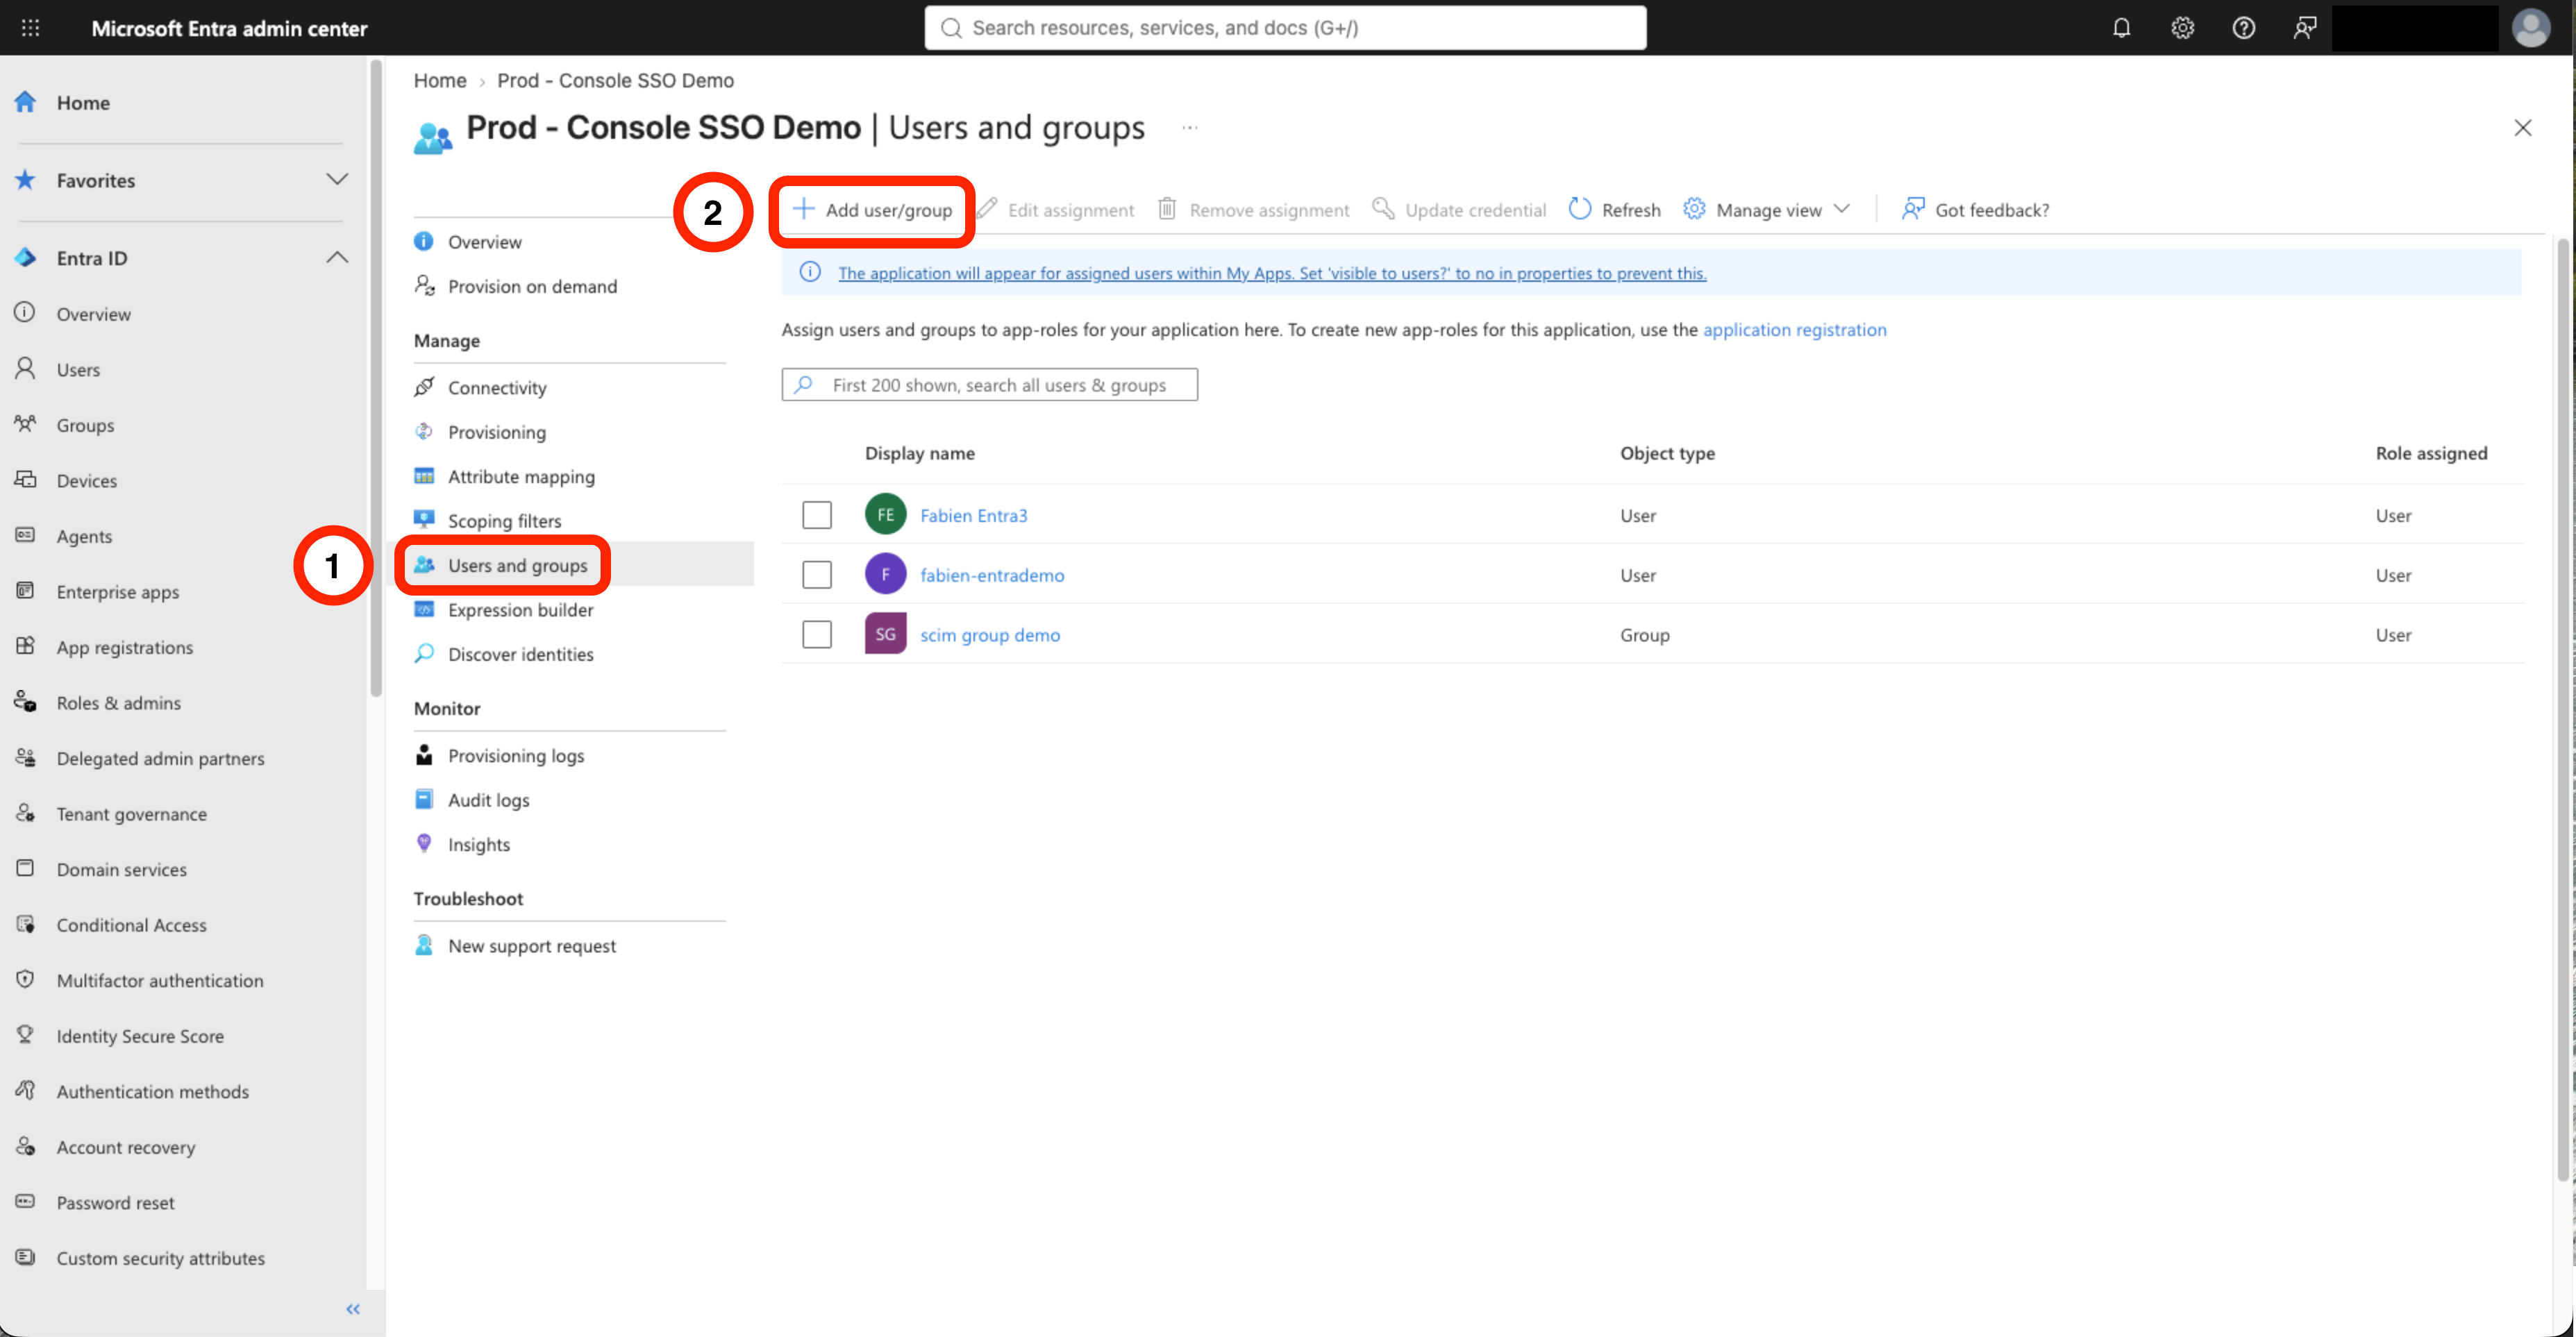
- Open Users and groups and assign the users, or the groups whose members should get a Console account. Assigning groups requires Entra ID P1 or P2.
- Test with one user: Provisioning > Provision on demand, pick a user, click Provision. Check that every step is green and that the account appears in Console.
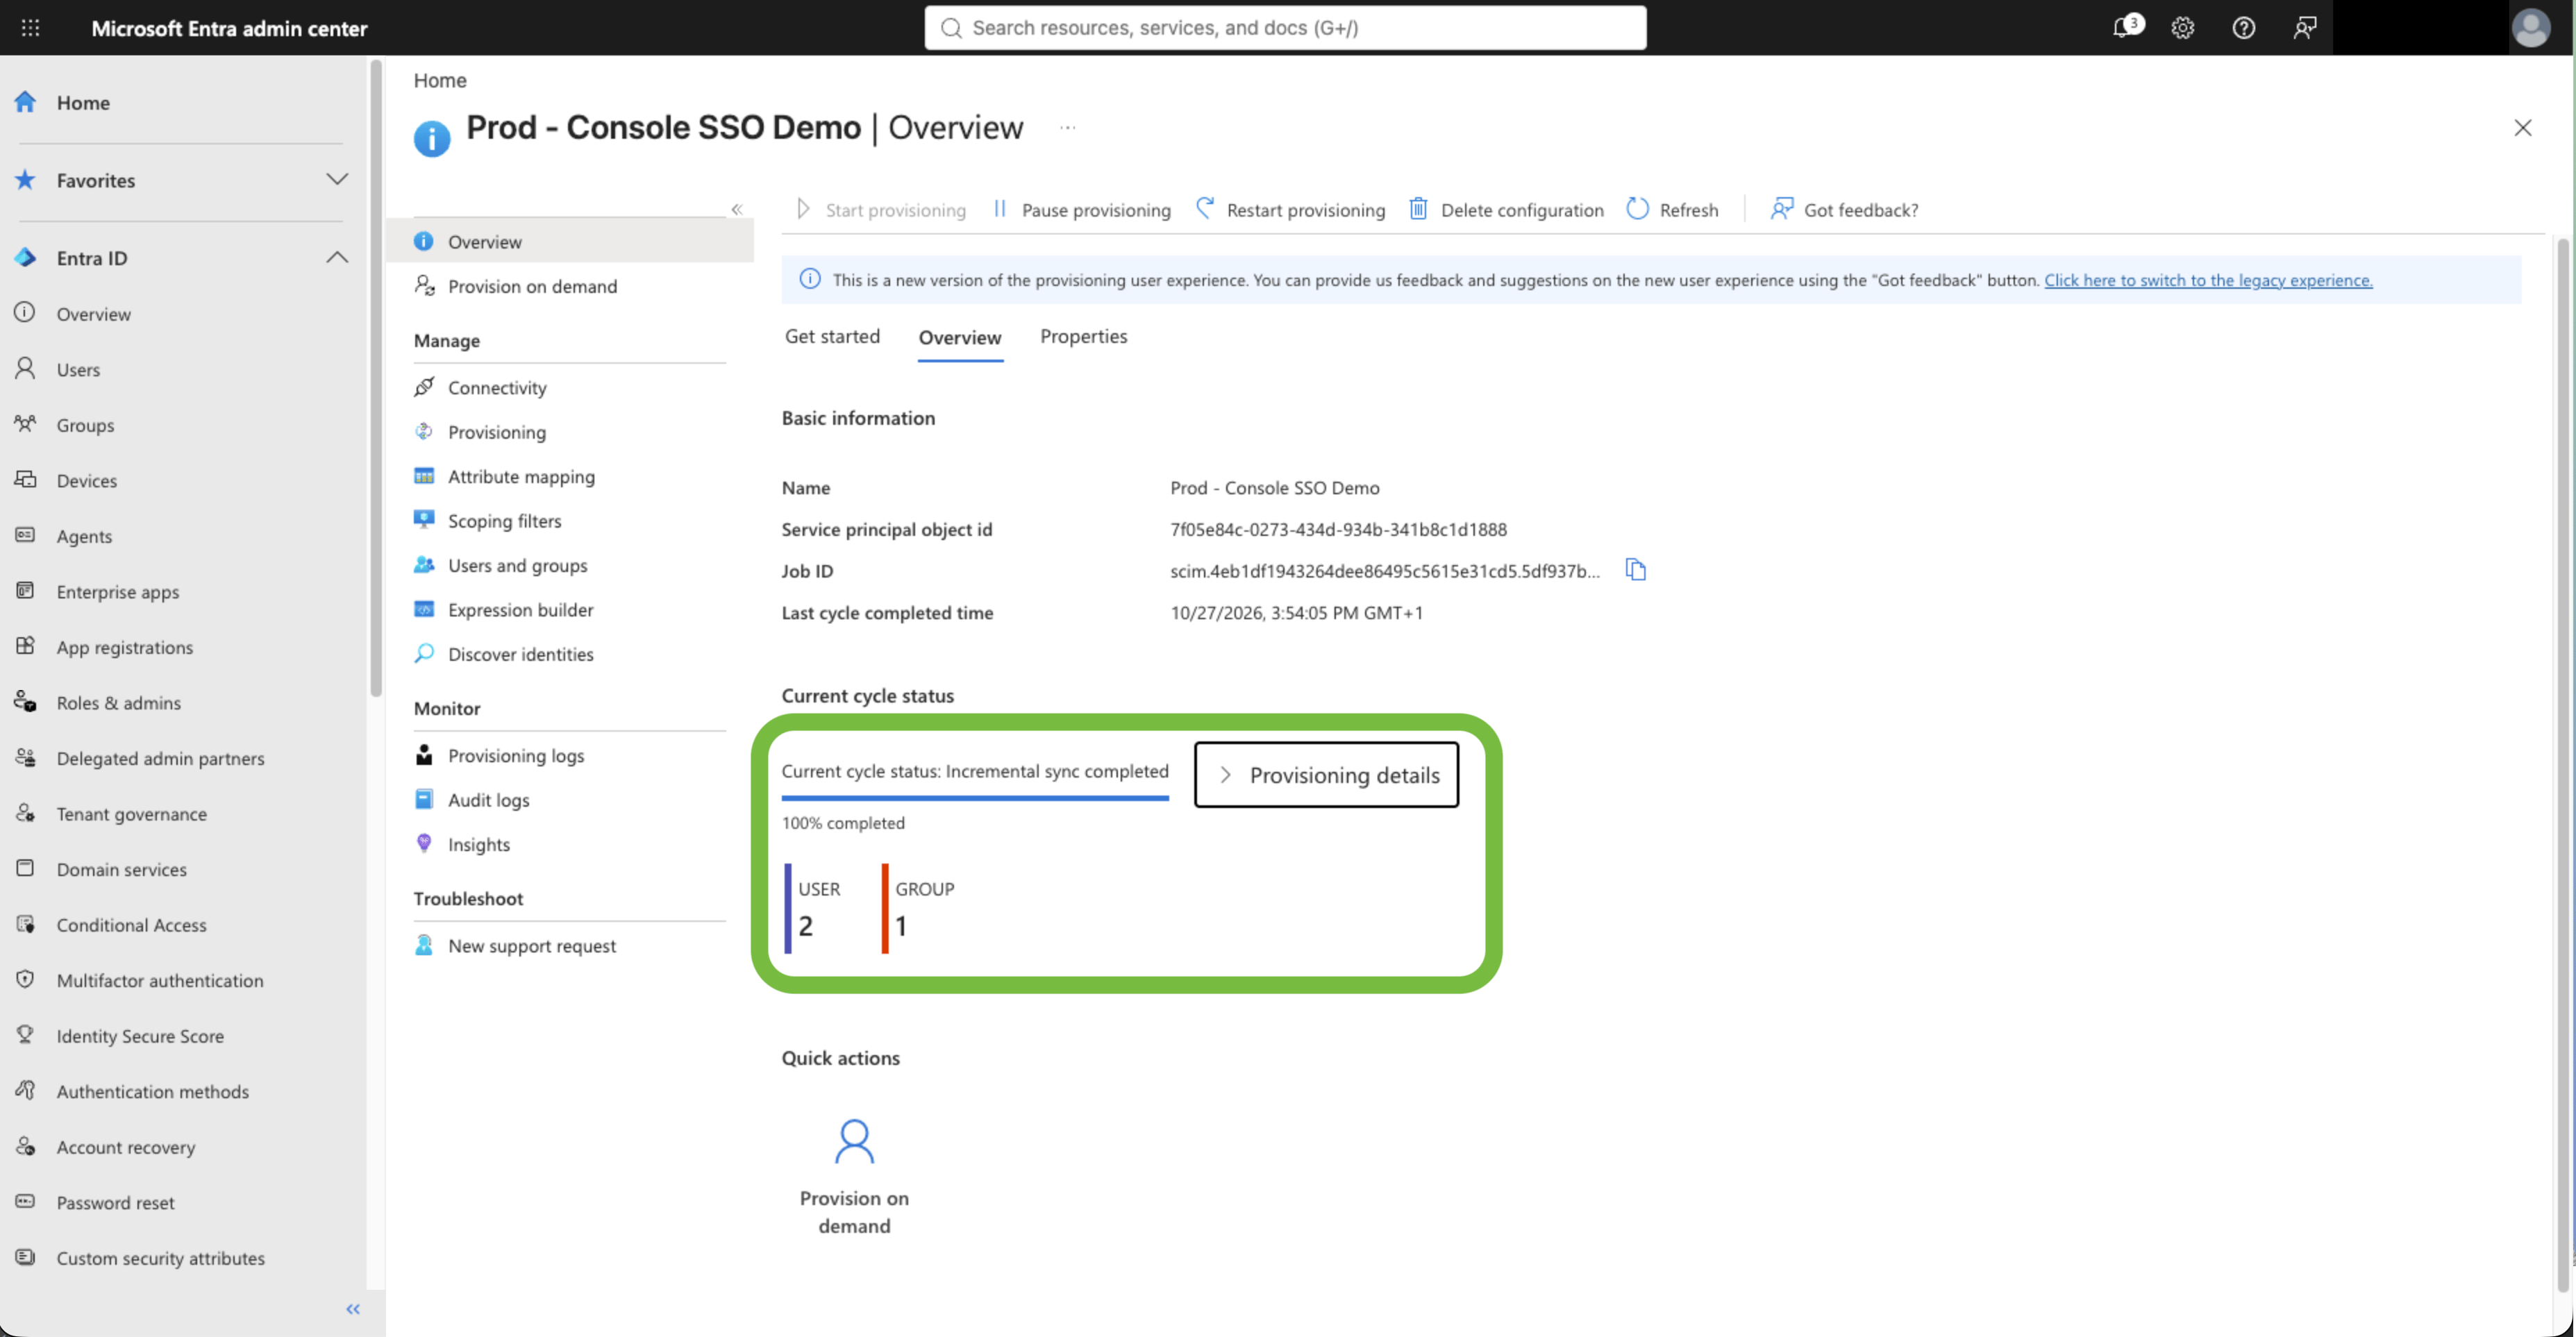
- Back on the Overview, click Start provisioning.
What happens in Console
| In Entra ID | In Console |
|---|---|
| User assigned to the application (directly or through a group) | Account created in the API key owner’s company, active if the Entra account is enabled. The user receives a welcome email. An existing account is taken over instead (see Users who already sign in with SSO). |
Name, email or userName changed | Account updated at the next cycle. |
| Account disabled (Block sign in) | Account deactivated: the user cannot sign in. Their data is kept. |
| Account enabled again | Account reactivated. |
| User unassigned, or removed from the assigned group | Account deactivated (Entra’s default for users leaving the scope). |
| User deleted (moved to Deleted users) | Account deactivated. Restoring the user in Entra reactivates it. |
| User permanently deleted (or 30 days after deletion) | Account anonymized and deactivated. This cannot be undone; provisioning the person again creates a new, empty account. |
Troubleshooting
Errors appear in Provisioning > Provisioning logs. Filter on Status: Failure and open the entry.
If Entra puts the application in quarantine after repeated failures, fix the cause, then click Restart provisioning on the Overview.
Users who already sign in with SSO
Console may already hold accounts for some of your users: SSO creates one at a person’s first sign-in when auto-provisioning is on, and an admin may have created others by hand. Before creating anyone, Entra looks for an existing account in your company whose username equals the user’suserName, ignoring case. An account created by SSO has, as username, the email SSO sent at that first sign-in.
With the mapping of step 4, an SSO account is in the first row when its username is the person’s UPN, and in the second row otherwise, never the third. The second row happens when SSO sends
mail and it differs from the UPN, or when the UPN changed after the person’s first SSO sign-in. Fix it once: a Console admin sets those accounts’ username to their current UPN, then Provision on demand takes them over.
The other direction needs nothing: when a provisioned user signs in with SSO for the first time, Console links the sign-in to their account by email, as long as SSO sends the same email.
Check before you start. Run Provision on demand (step 5) on a person who already signs in with SSO. The provisioning log must show an Update of the existing account, not a Create.
If duplicates were already created: fix the mapping (step 4), delete the duplicate accounts in the Console admin panel, then click Restart provisioning on the application’s Overview so that Entra looks every user up again.